
Meshtastic notes
Migration
5.26.25: Updates to this page are now located at
Or from the elab.hpa.edu main page
Why would I use this:
- Hikers or back country out of direct range to cellular or internet
- Emergency workers where infrastructure is damaged, overloaded or non-existent
- Remote neighborhoods cutoff from outside communication
- Casual users or events (e.g. marathons, conventions)
Background:
- Meshtastic uses low power radios in
progressa mesh configuration, meaning to communicate with another unit, one only needs to connect to any unit in the mesh. - It links to your phone or computer using bluetooth, so there is no internet needed.
- To link to units beyond the mesh links, a messaging server (MQTT) on the internet can be linked to any mesh, either using your phone connection (cellular to internet) or other broadband internet connection (e.g. satellite or land internet).
- The radios use a frequency originally used by cordless phones (900 mHz) but with very low power, in a digital mode, using very small bandwidth-all meaning the range can be many miles for very small, very low power units.
- The wavelength of these units (900 mHz) is "bendy" meaning you may not have line of sight to another in the mesh, but still make a link, much more flexible than normal UHF or SHF radio.
- Meshtastic units use a free, unlicensed technology called LoRaWan, or LoRa for short, meaning long range, which has been used in the past for data like sensors on a wide area network (LoRaWan).
- Meshtastic is a free, unlicensed messaging solution that is text only, linked to phones or computers by bluetooth, with options to connect by wifi or usb connection.
- Meshtastic units are relatively inexpensive, as they are simply modified firmware running on existing small IoT devices, most for around $30
- Some kits include battery, screen and a case for around the same price
- Most small units have a battery life of 4-12 hours, with some units solar powered for remote "repeater" uses.
- Meshtastic units are programmed using bluetooth to a phone app (meshtastic app) or using a wired usb connection using chrome and the meshtastic web app from meshtastic.org
- To upgrade meshtastic units, a wired usb connection is easiest and necessary in most cases, using chrome and the web flasher app from meshtastic.org
- Meshsense is an app from affirmatech.com that runs on computers to map out mesh networks, including those linked by the messaging server
Setup:
Here are a set of screenshots from a typical mesh setup I have.
The easiest device to use in my experience is the ESP32-S3, but the Lilygo T-beam S3 is also quite good.
Both have a display, unlike the RAK unit, which is also easy to use, but has no display, but is much better on power, if that’s an issue.
My out of the box process:
The easiest device to use in my experience is the ESP32-S3, but the Lilygo T-beam S3 is also quite good.
Both have a display, unlike the RAK unit, which is also easy to use, but has no display, but is much better on power, if that’s an issue.
My out of the box process:
- connect antennas if present (critical: if you power up the device without, it can damage the RF chip)
- connect via usb to computer running chrome (mac or pc, must be newer)-see below
- update firmware using the app from meshtastic.org (include web server for ESP32 units)
- remove from computer, power externally, join by bluetooth use app (iPhone, iPad, m1 mac, android)
- set LoRa region (below)
- if unit has a screen, go to bluetooth and change code to static (123456)
- enable MQTT messaging in LoRa
- enable MQTT under modules if you like
We’ll be using the meshtastic app on a mac (m1 "Apple
We will be using the 2.6.x version of firmware (see below)
You can also configure using chrome (web, bluetooth, serial) which I’ll cover next.
You can also configure using chrome (web, bluetooth, serial) which I’ll cover next.
Download the meshtasic app, should see this:
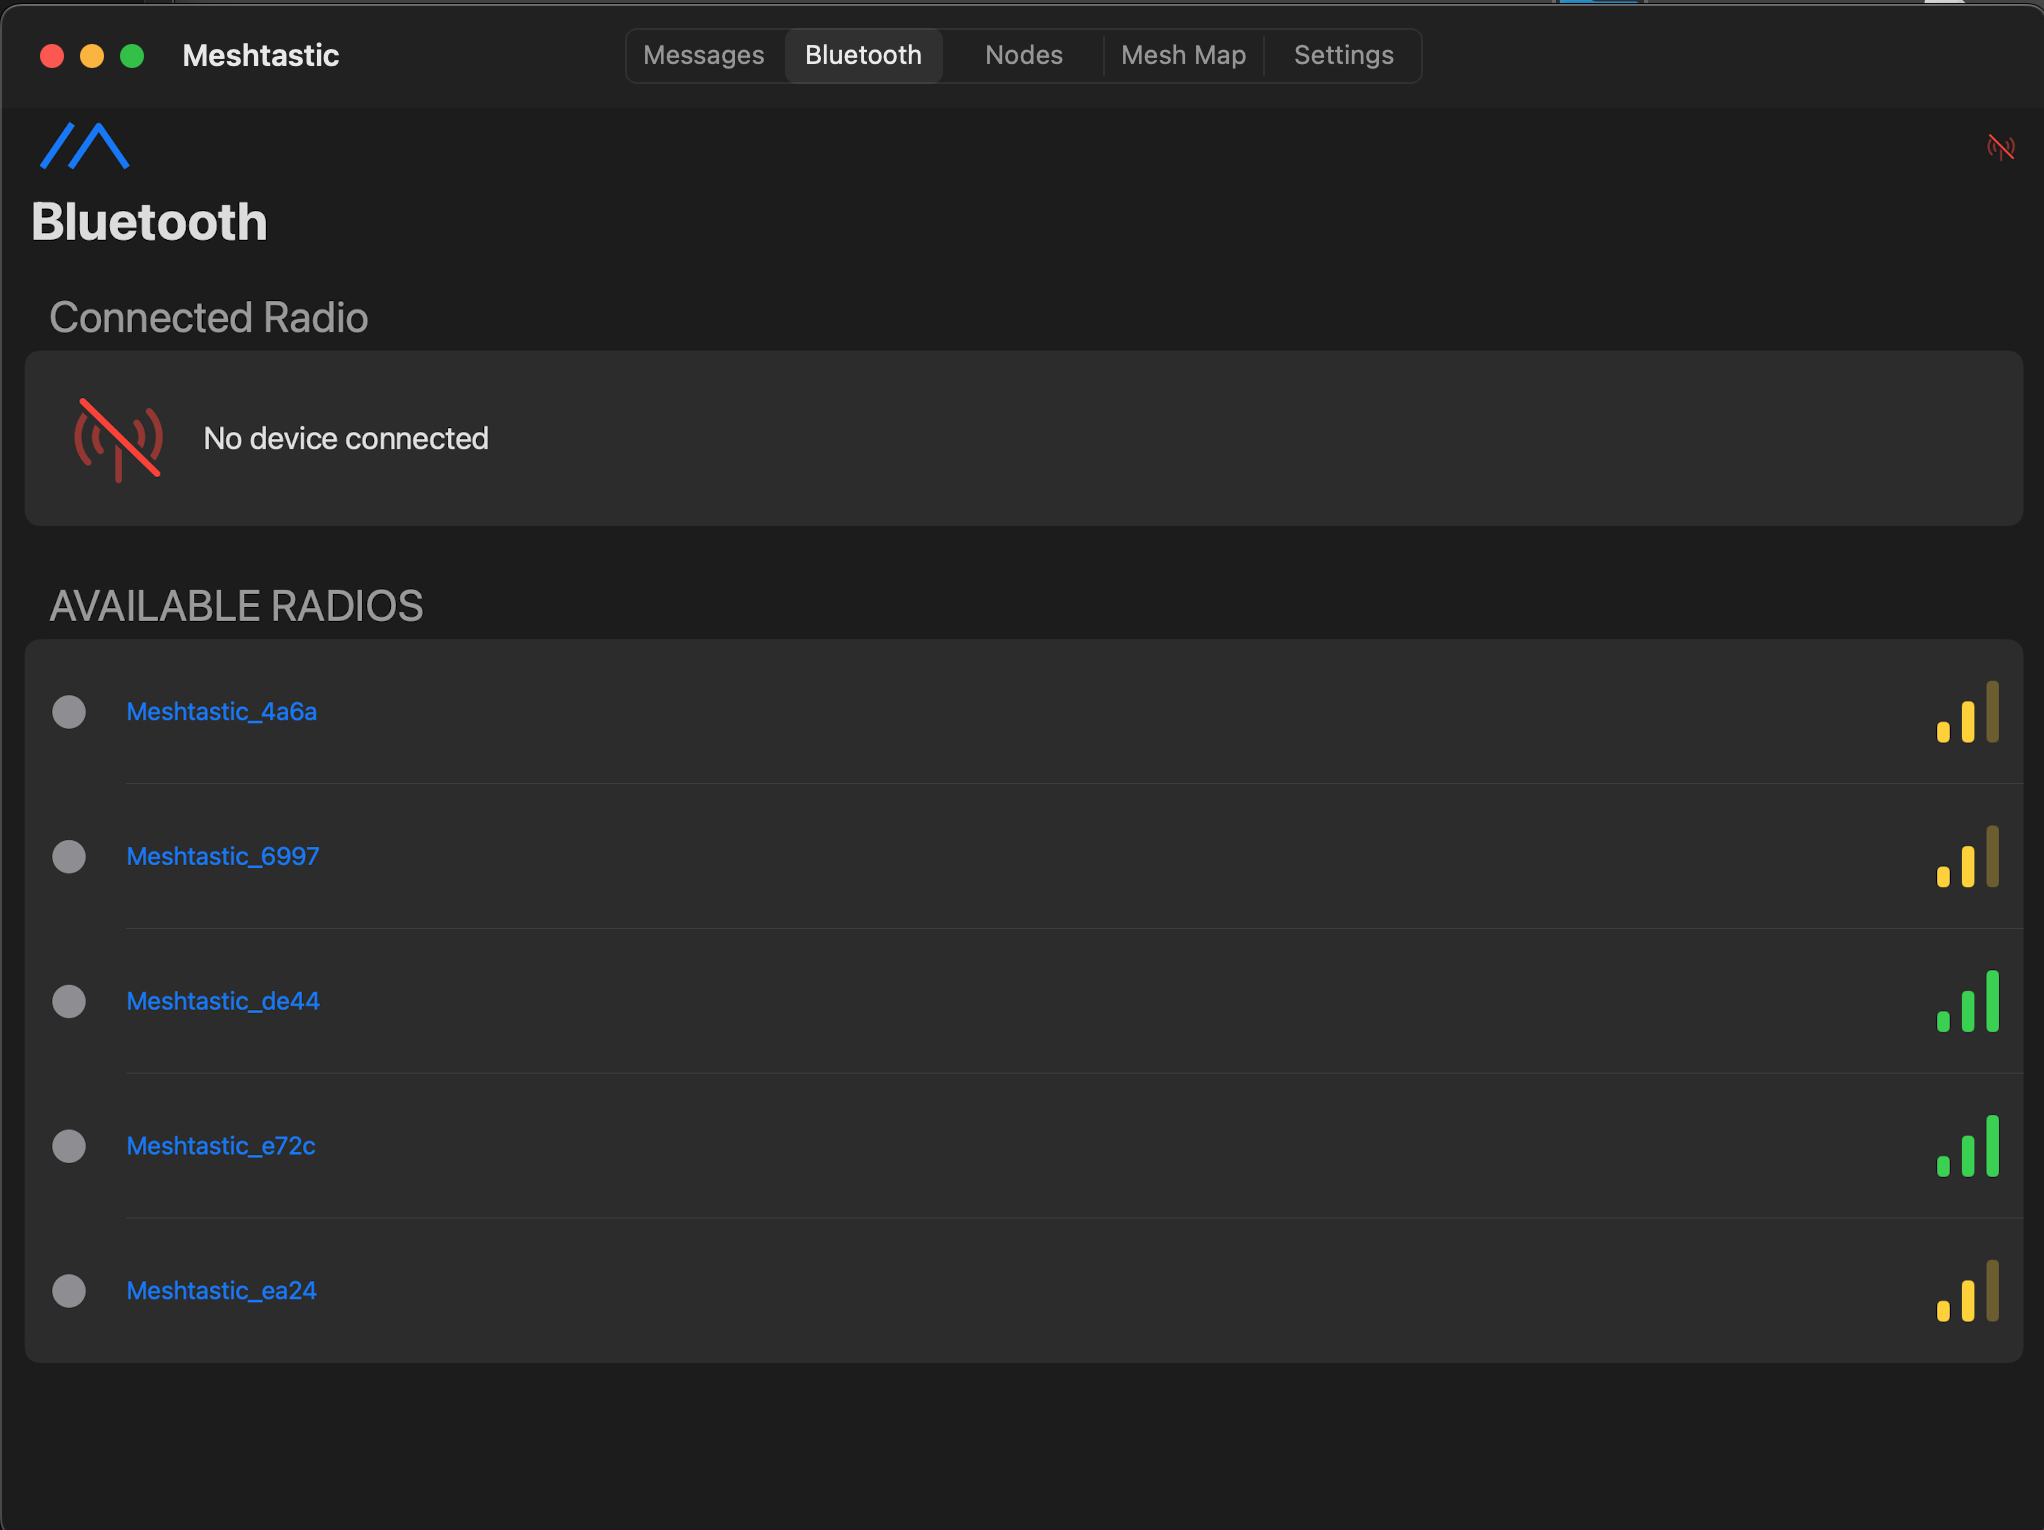
You may know the MAC (machine ID) for your device, if you have multiples, you can power them off, or wrap in foil (never disconnect antenna under power)
Click the device, you should see this:
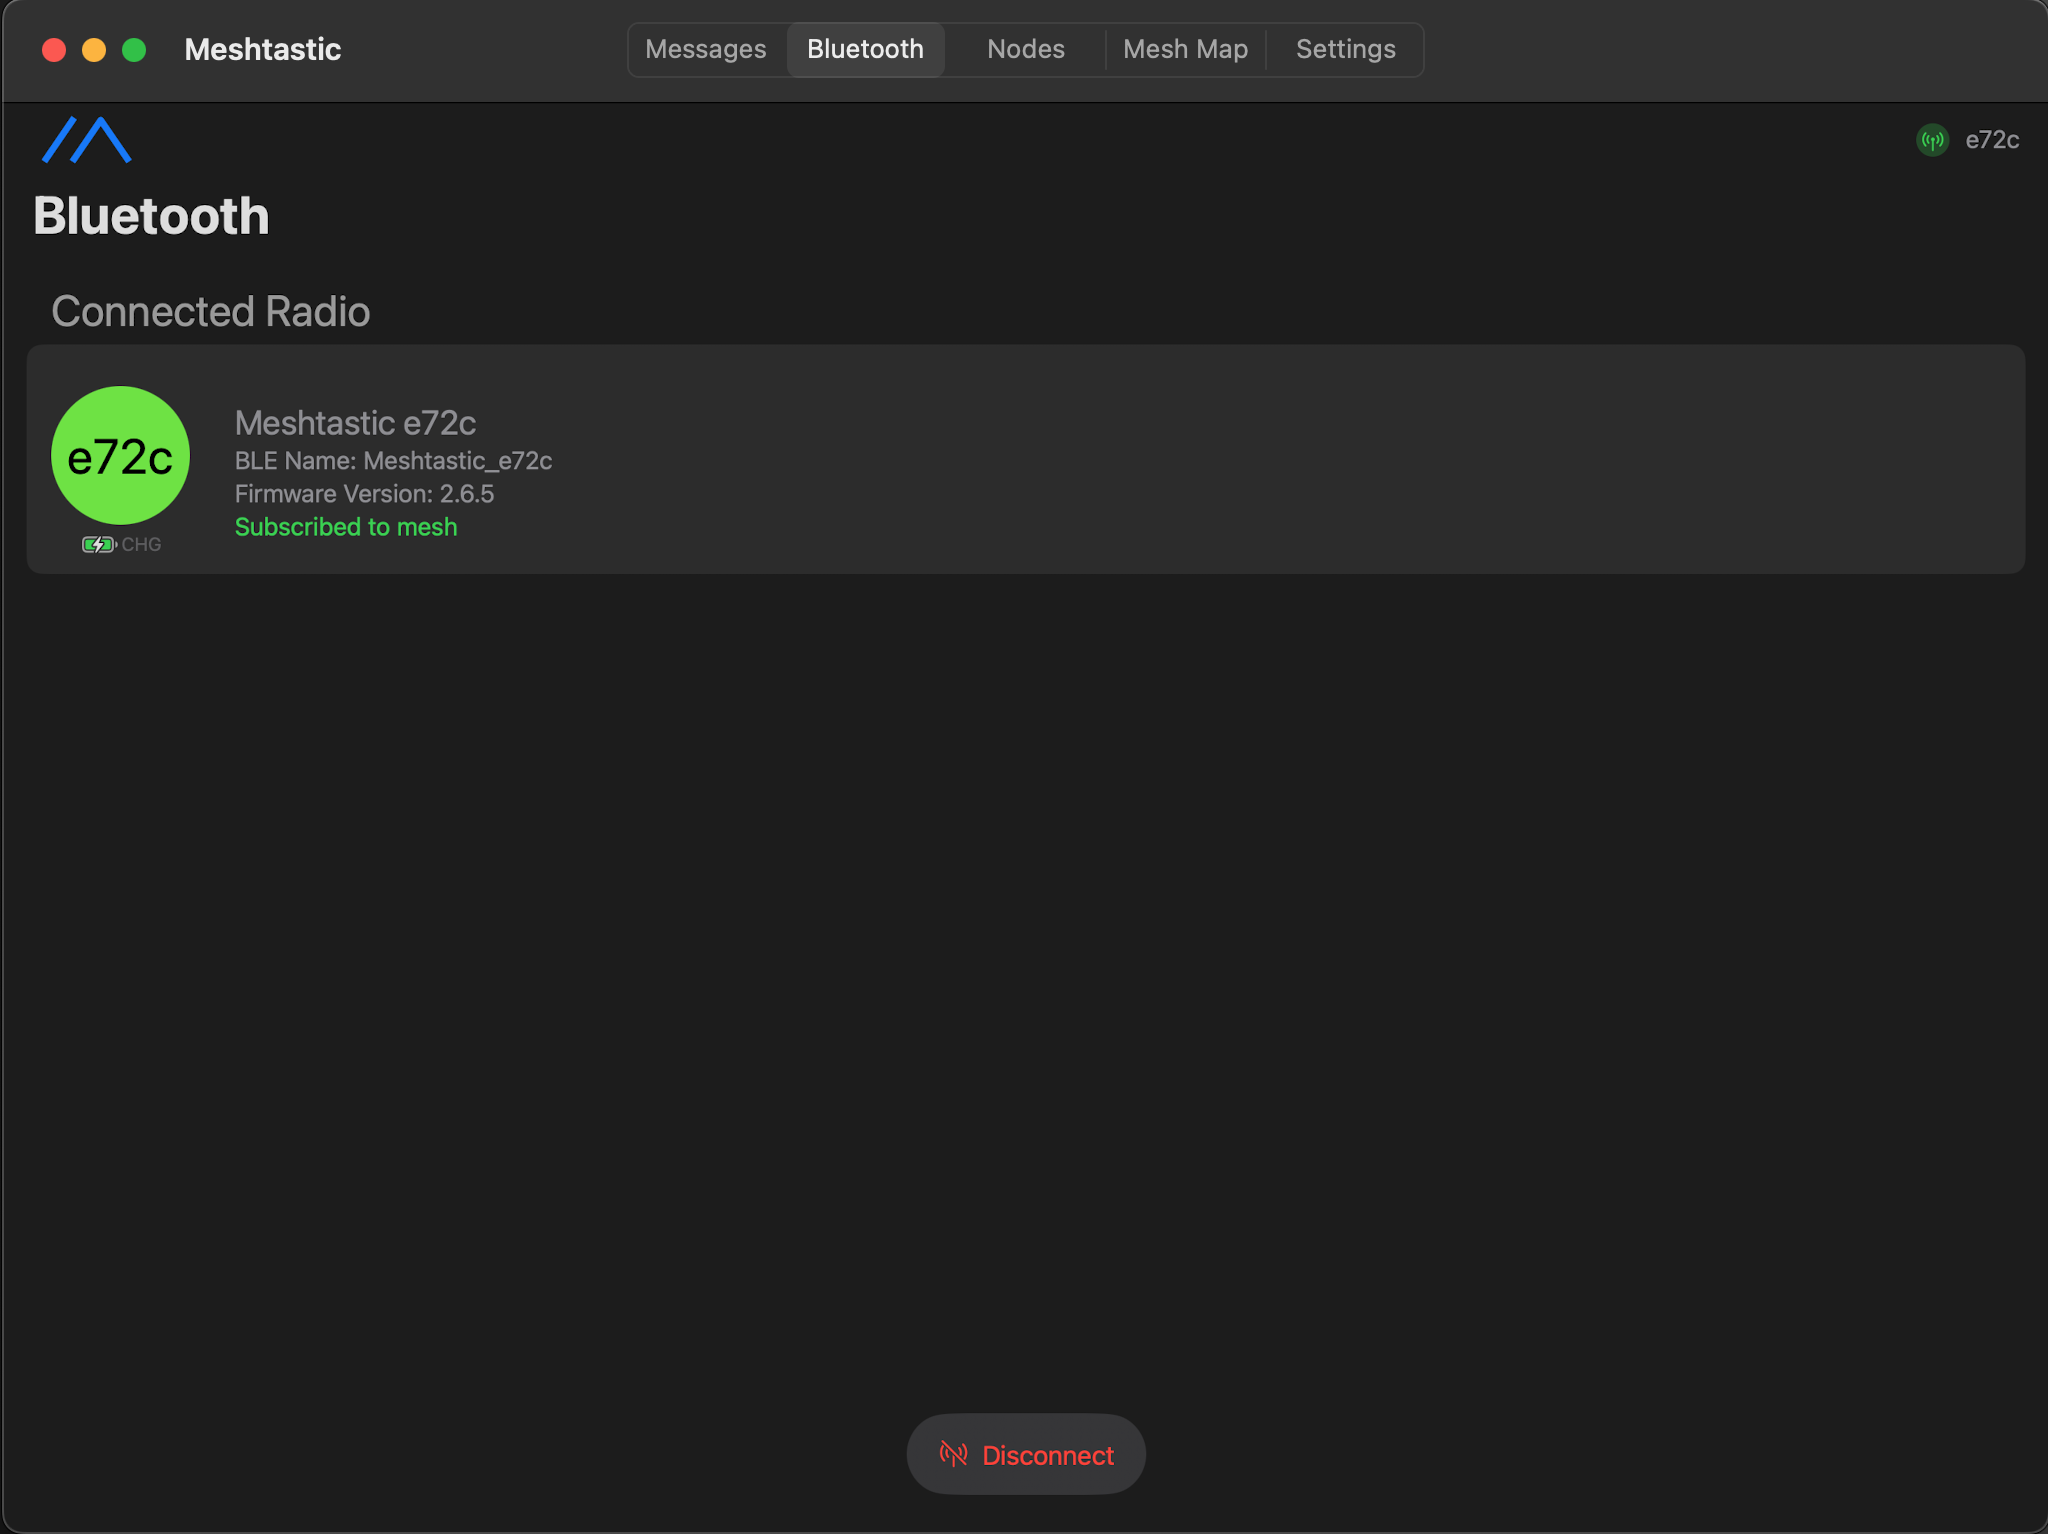
Upper left shows we are managing the device e72c
Big main page f2K4o8a.follows:
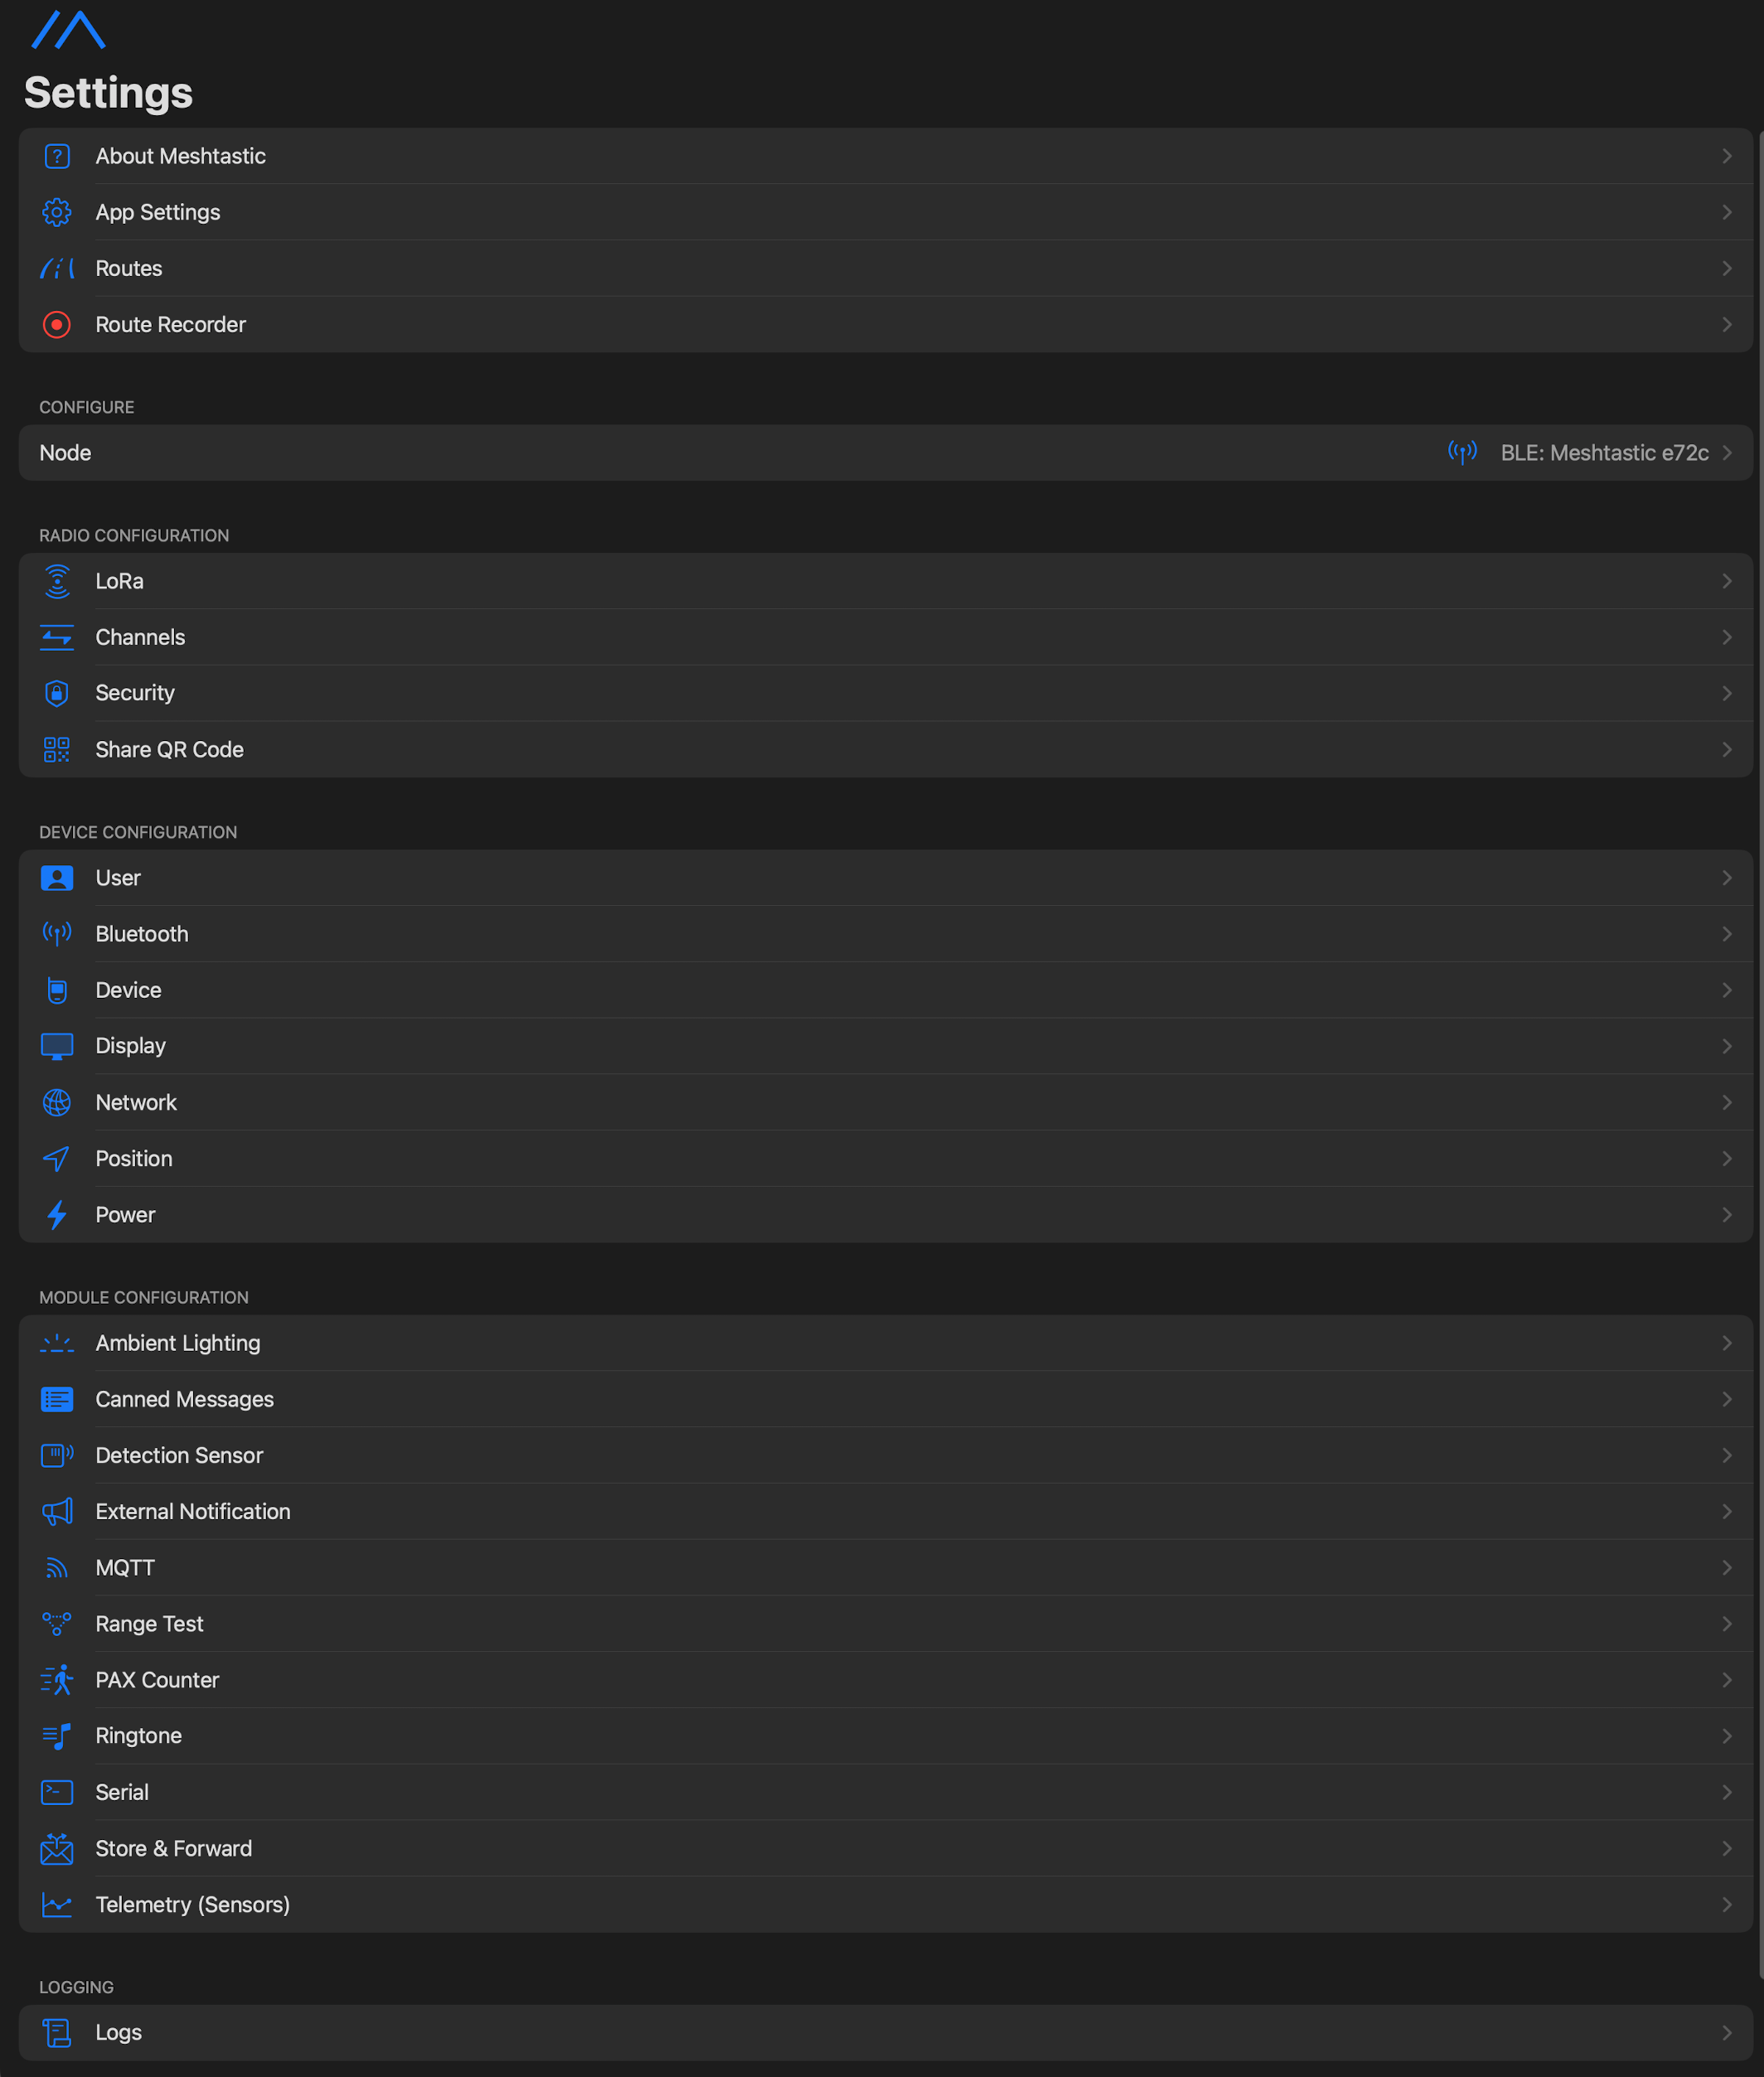
start with LoRa: make sure the region is US:
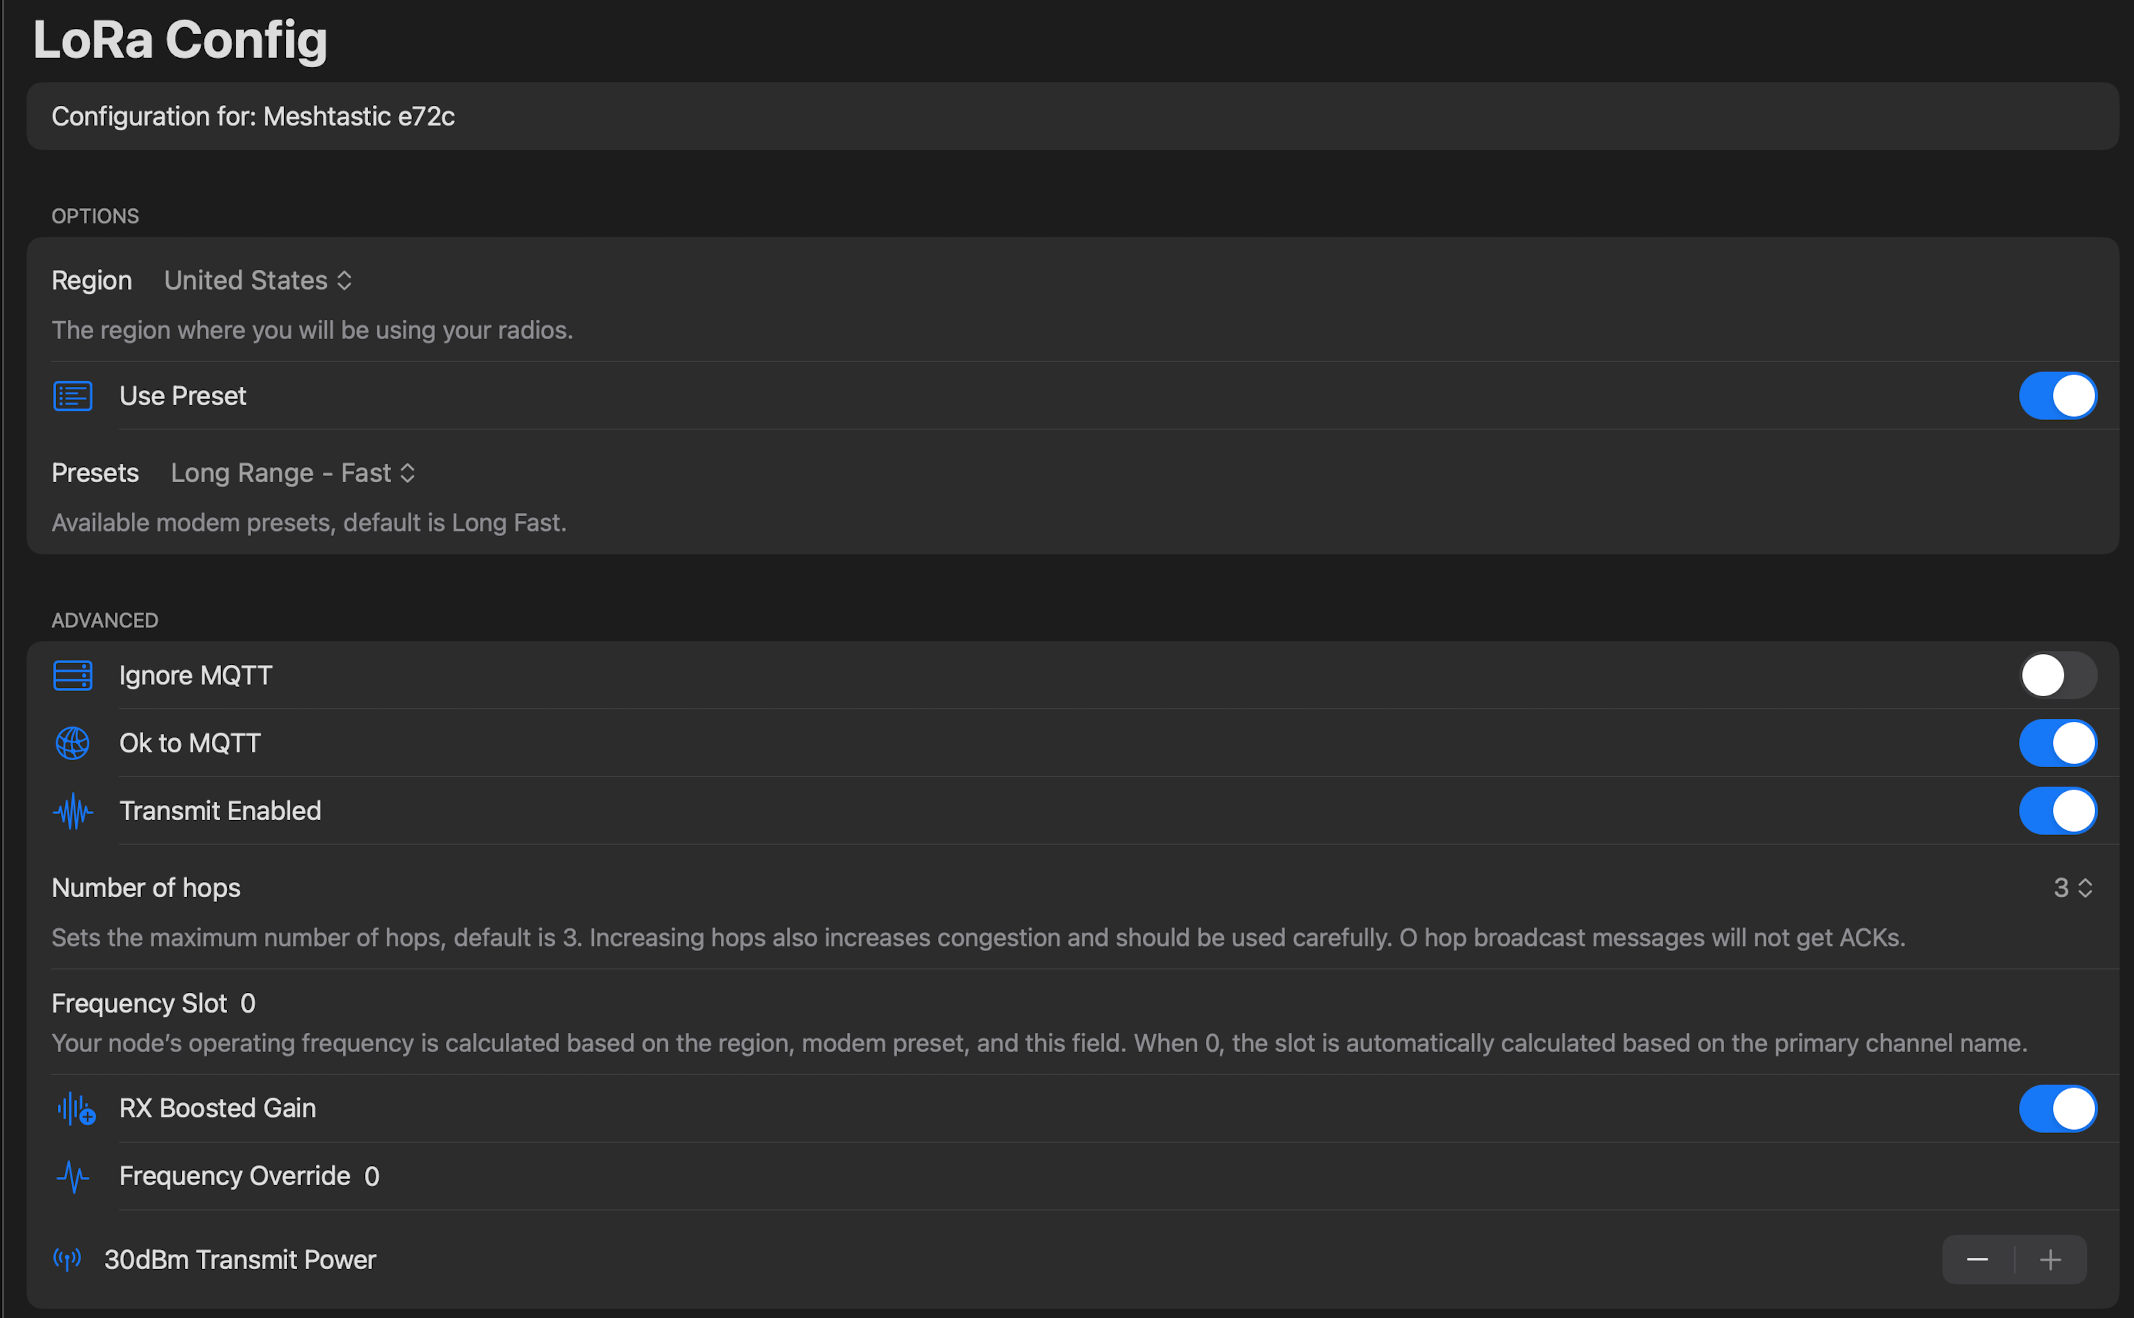
Even though the max power is 22 dBm, don't mess with the power setting unless you are using a station G2, in which case make this 19 dBm as feed for the PA (power amplifier)
Channels is next, you should see at least the primary channel, used for all MQTT and general messages. You can see I've added another channel, more on this later.
Click on Primary, you should see this:
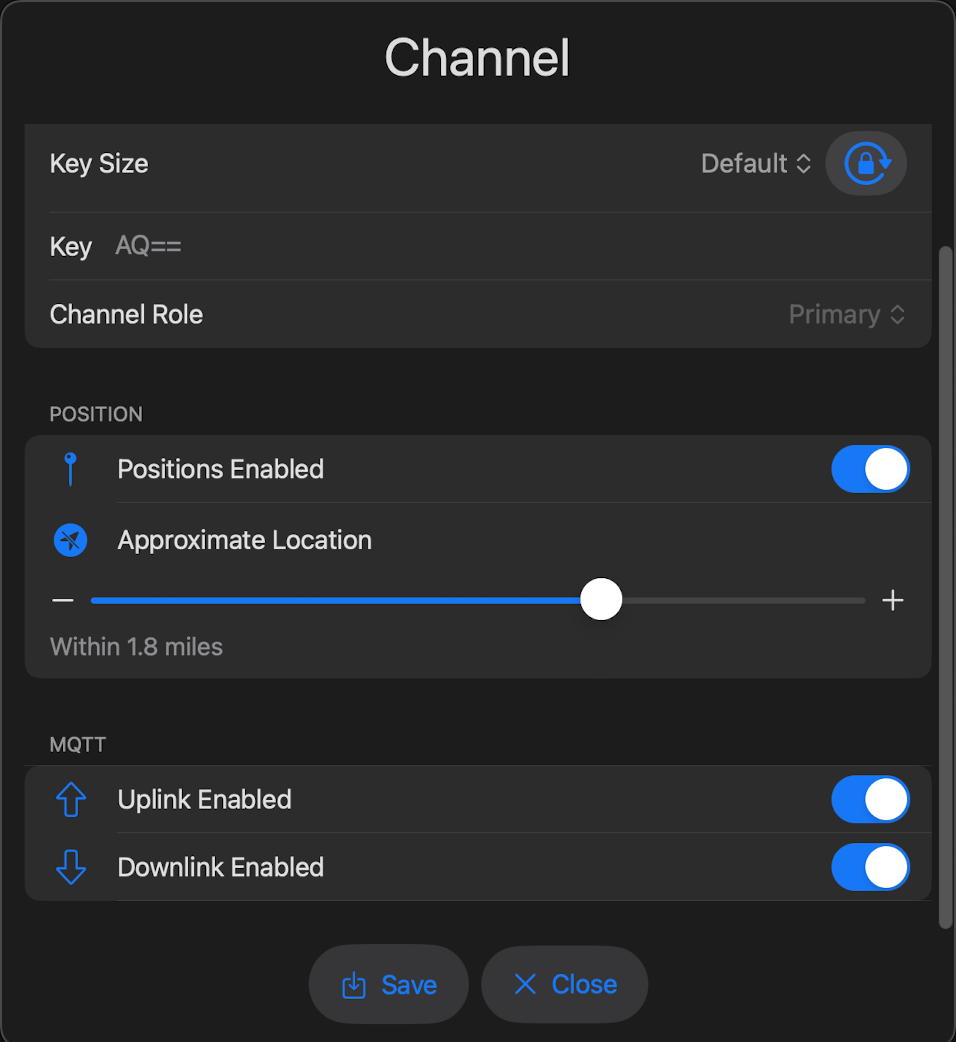
You can adjust the location accuracy if you like, but make sure uplink and downlink are enabled.
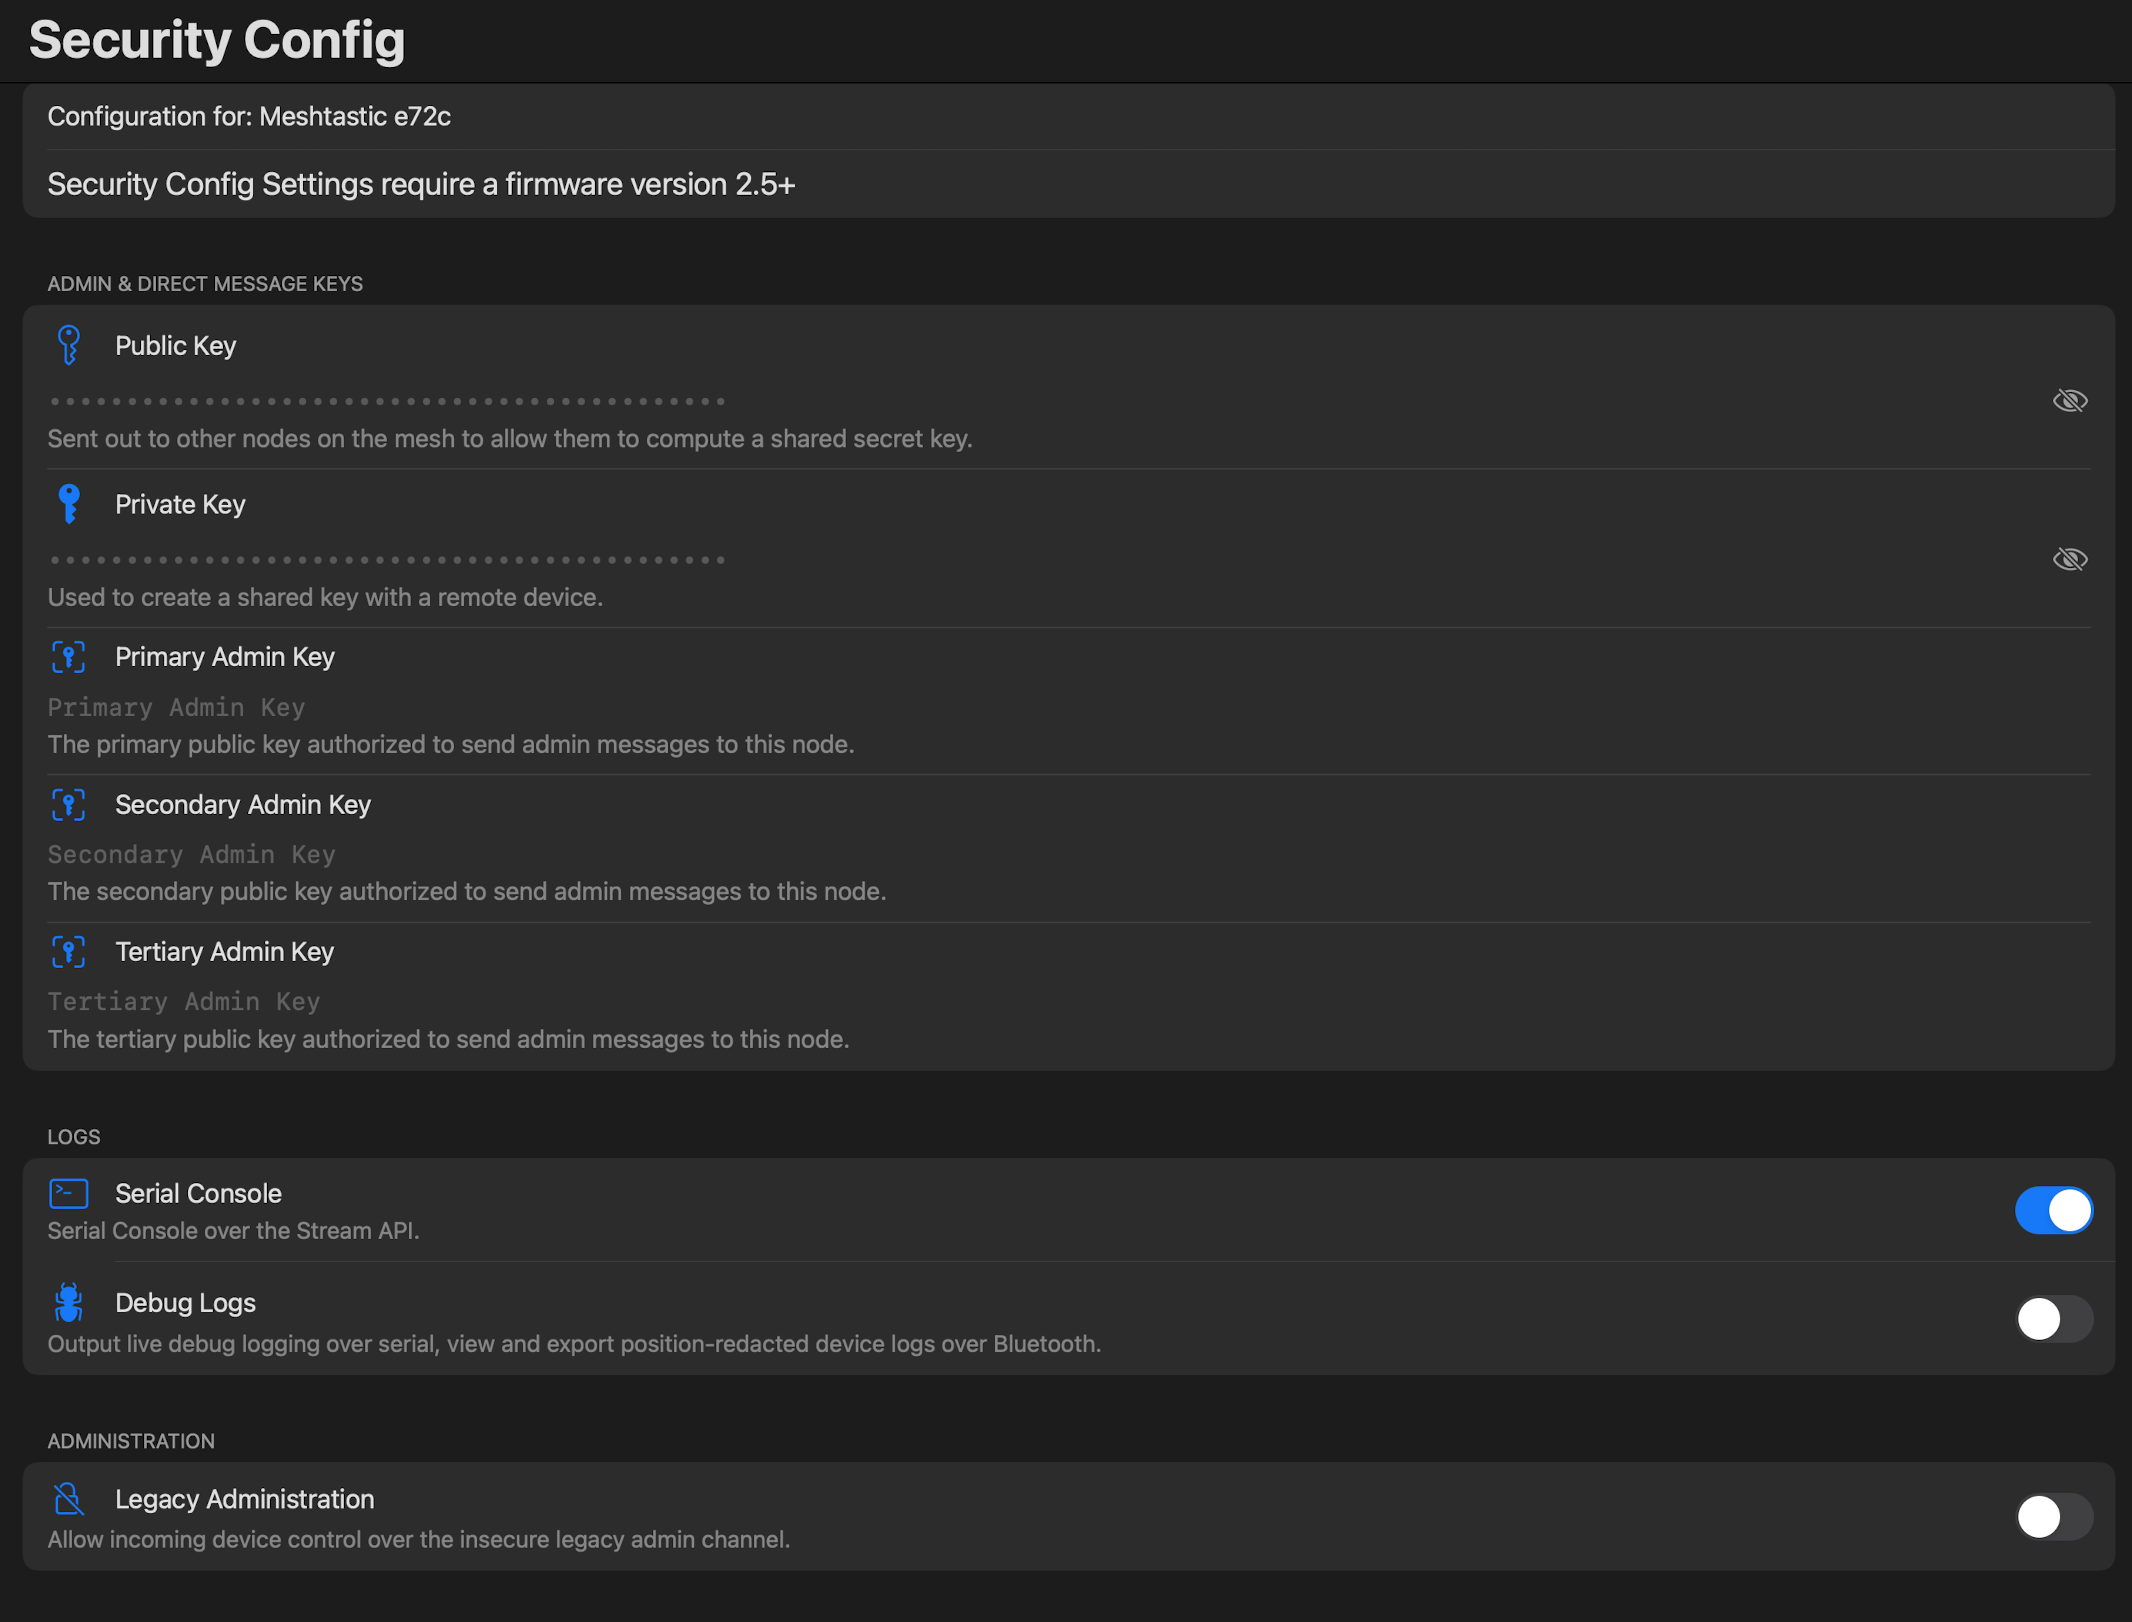
Security is not something you need to mess with unless you want to enable remote admin of your device. Also don't enable legacy admin unless you want to remote admin. Enabling serial and debugging are nice when you use either meshsense or chrome to look at the serial traffic.
QR code is nice if you want to share the QR code for your channel, ignore otherwise.
Be careful sharing this, it includes the key for your channel.
Next part may be of interest to hams: if you WANT to have your callsign, you don't have to click licensed operator, but if you do, it does it for you. It also disables encryption as per FCC regs, and gives you the "license" to push power beyond 1 Watt (30 dBm) which is the limit for most small amplifiers to 10 Watts max.
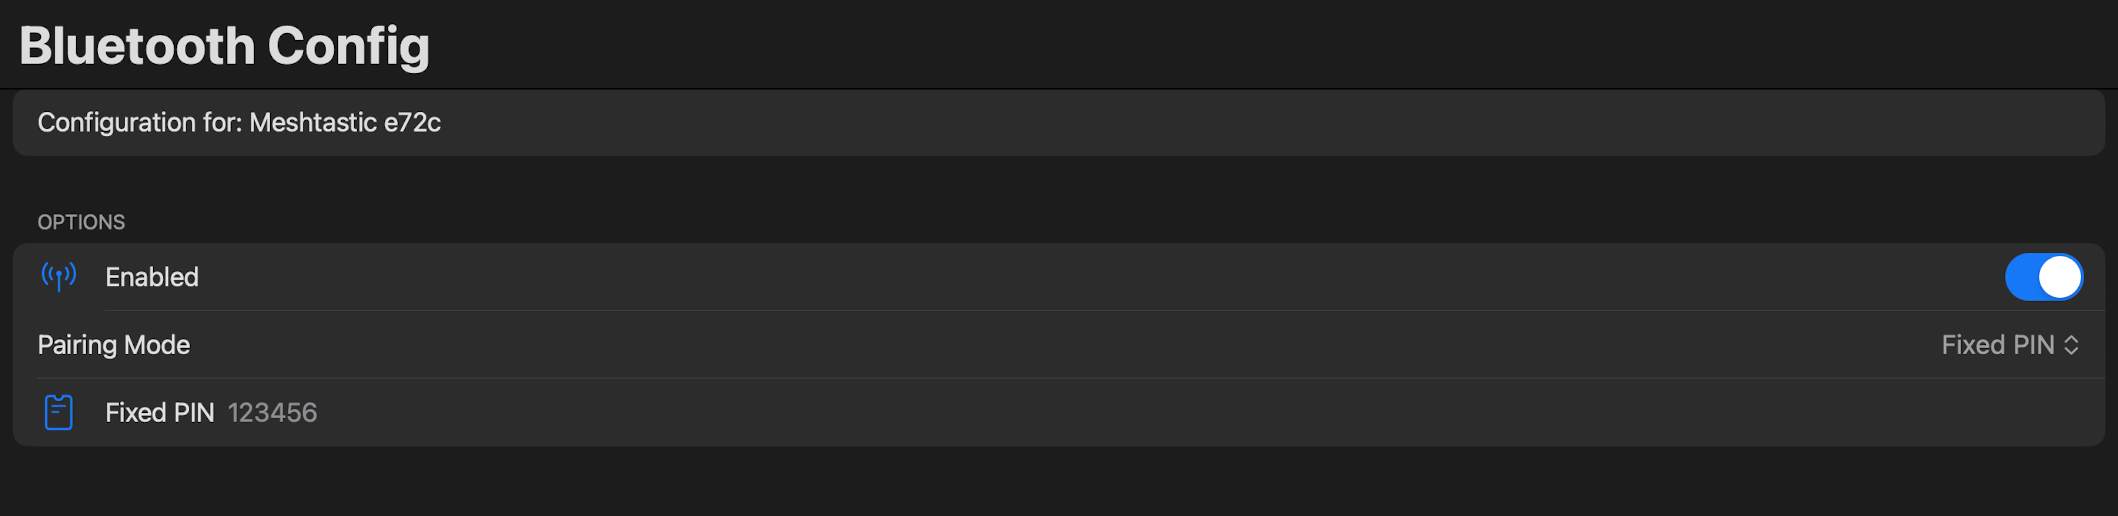
Make sure the next one is changed to fixed, which will make the bluetooth code 123456. This way you won't have to look at the screen if it is away. For devices with no screen, the default code is 123456. If you change the code to random on a unit with no screen, the only way to rescue it is by the serial connection ("code suicide").
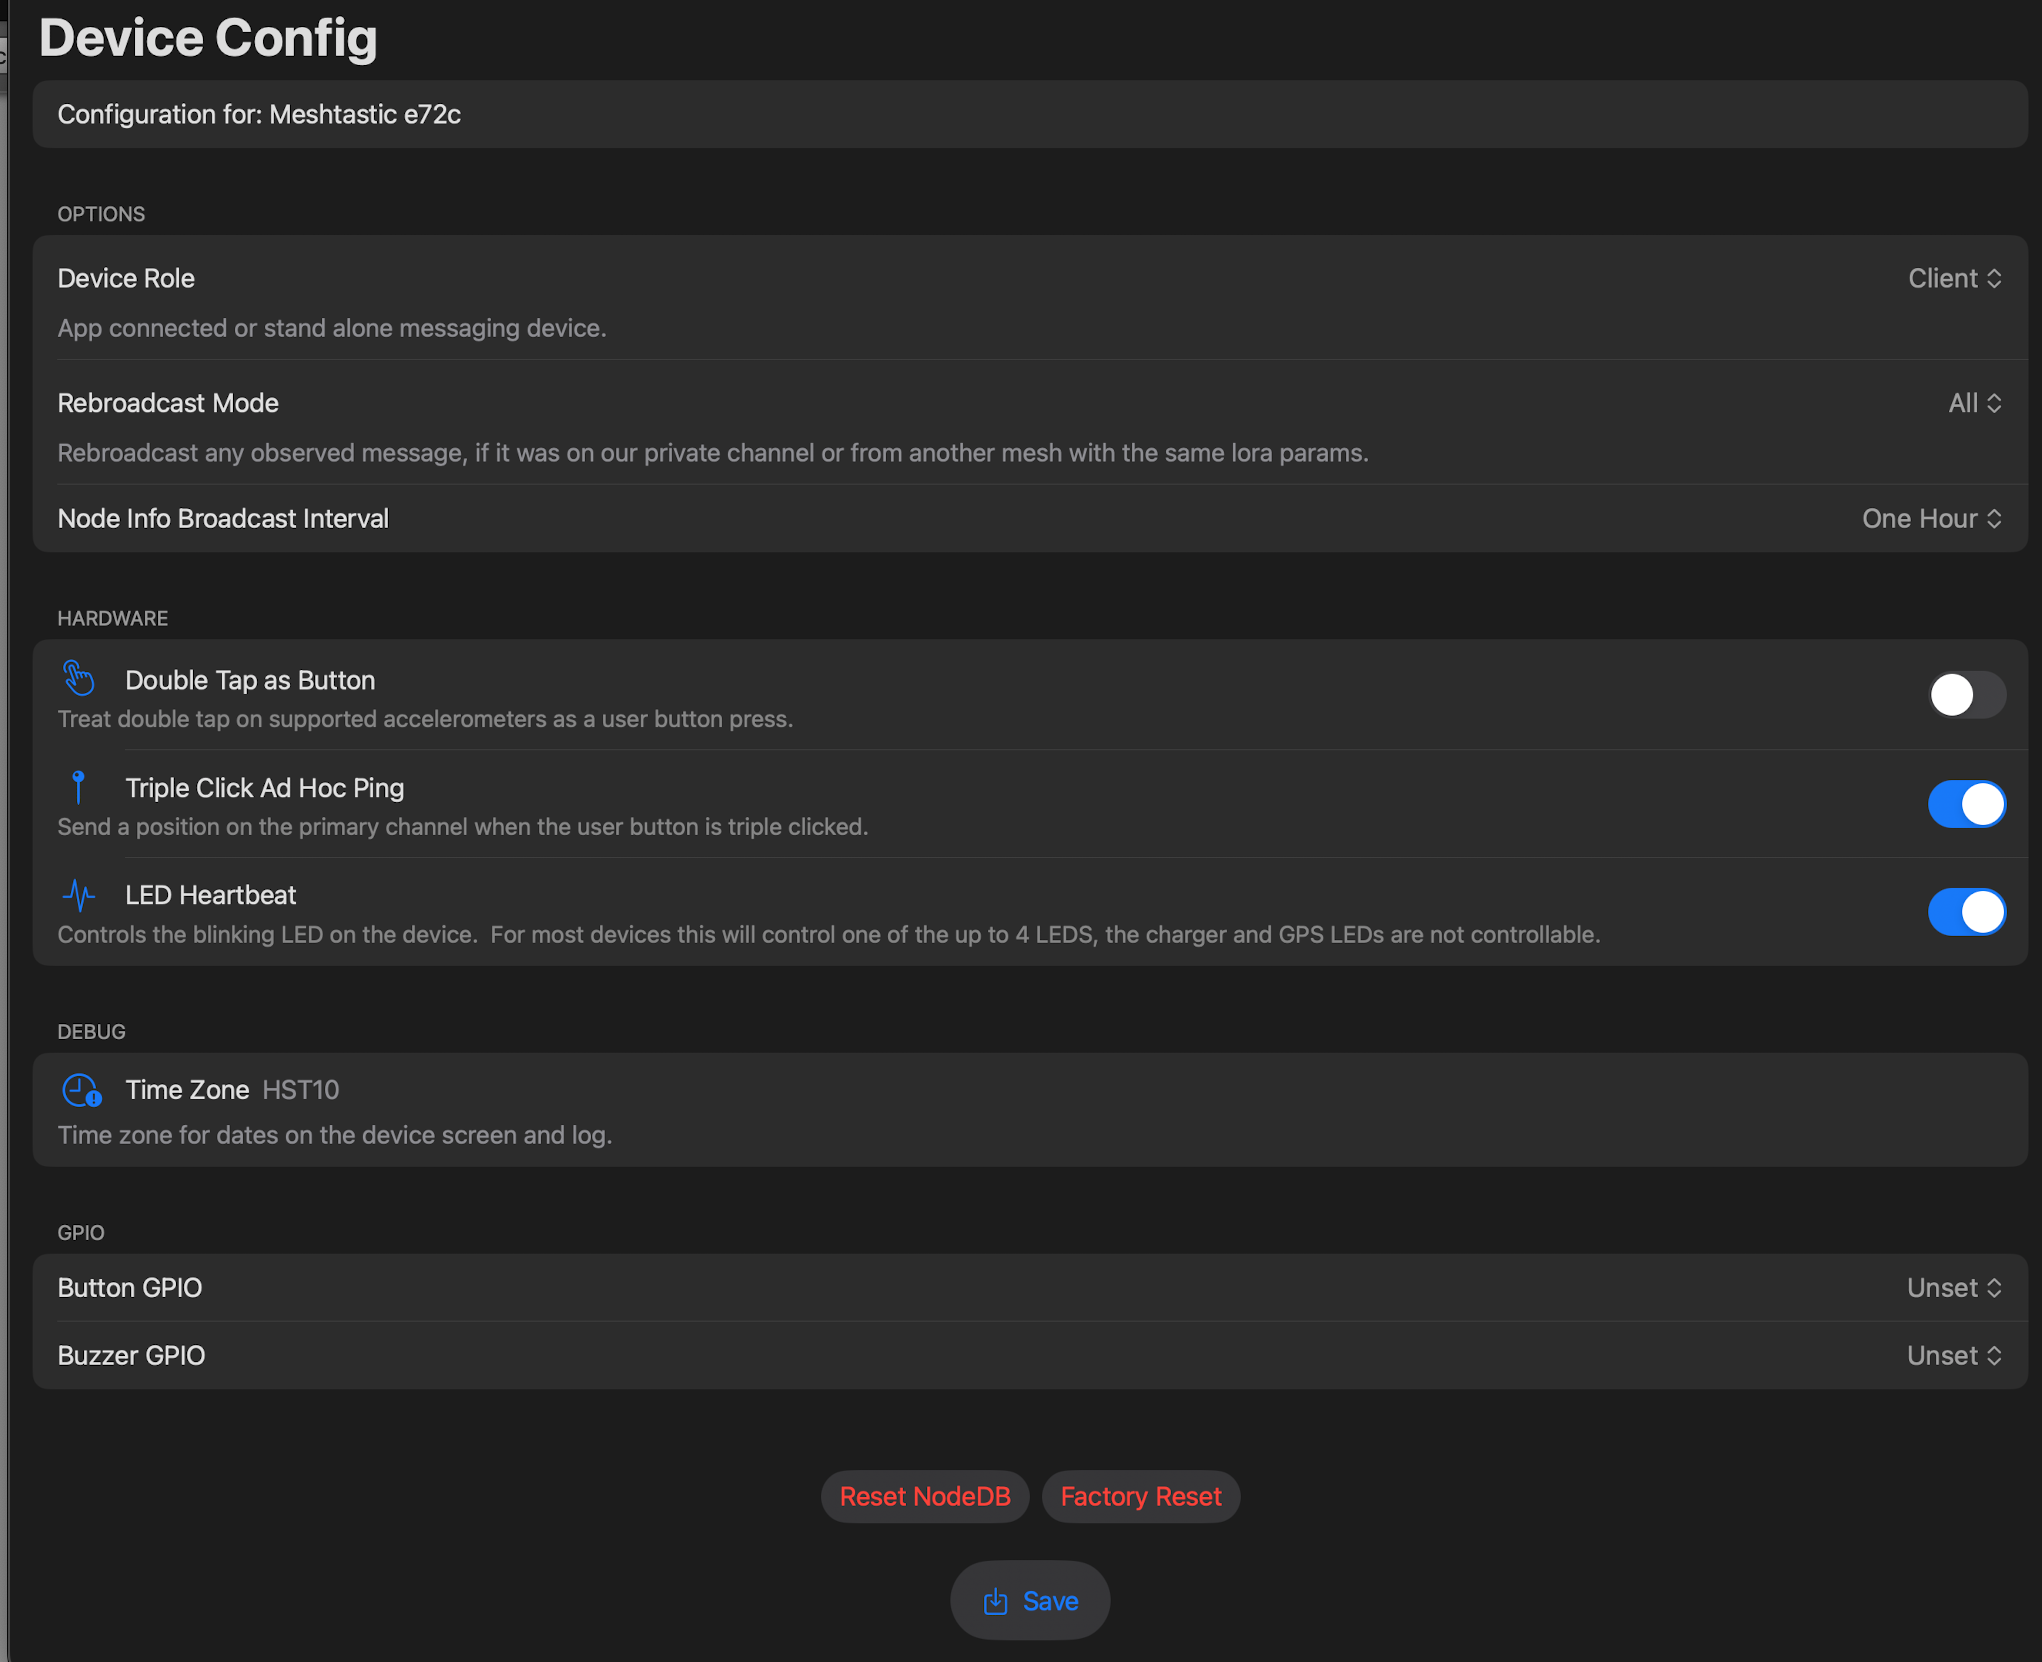
Simple.
Make sure rebroadcast all is enabled.
Note the lower buttons for reset, this erases the node info.
Steer clear of factory reset unless you really need to start from scratch.
Reset NodeDB is useful if you want to clear the database of your nodes, e.g. you relocate and want only fresh contacts
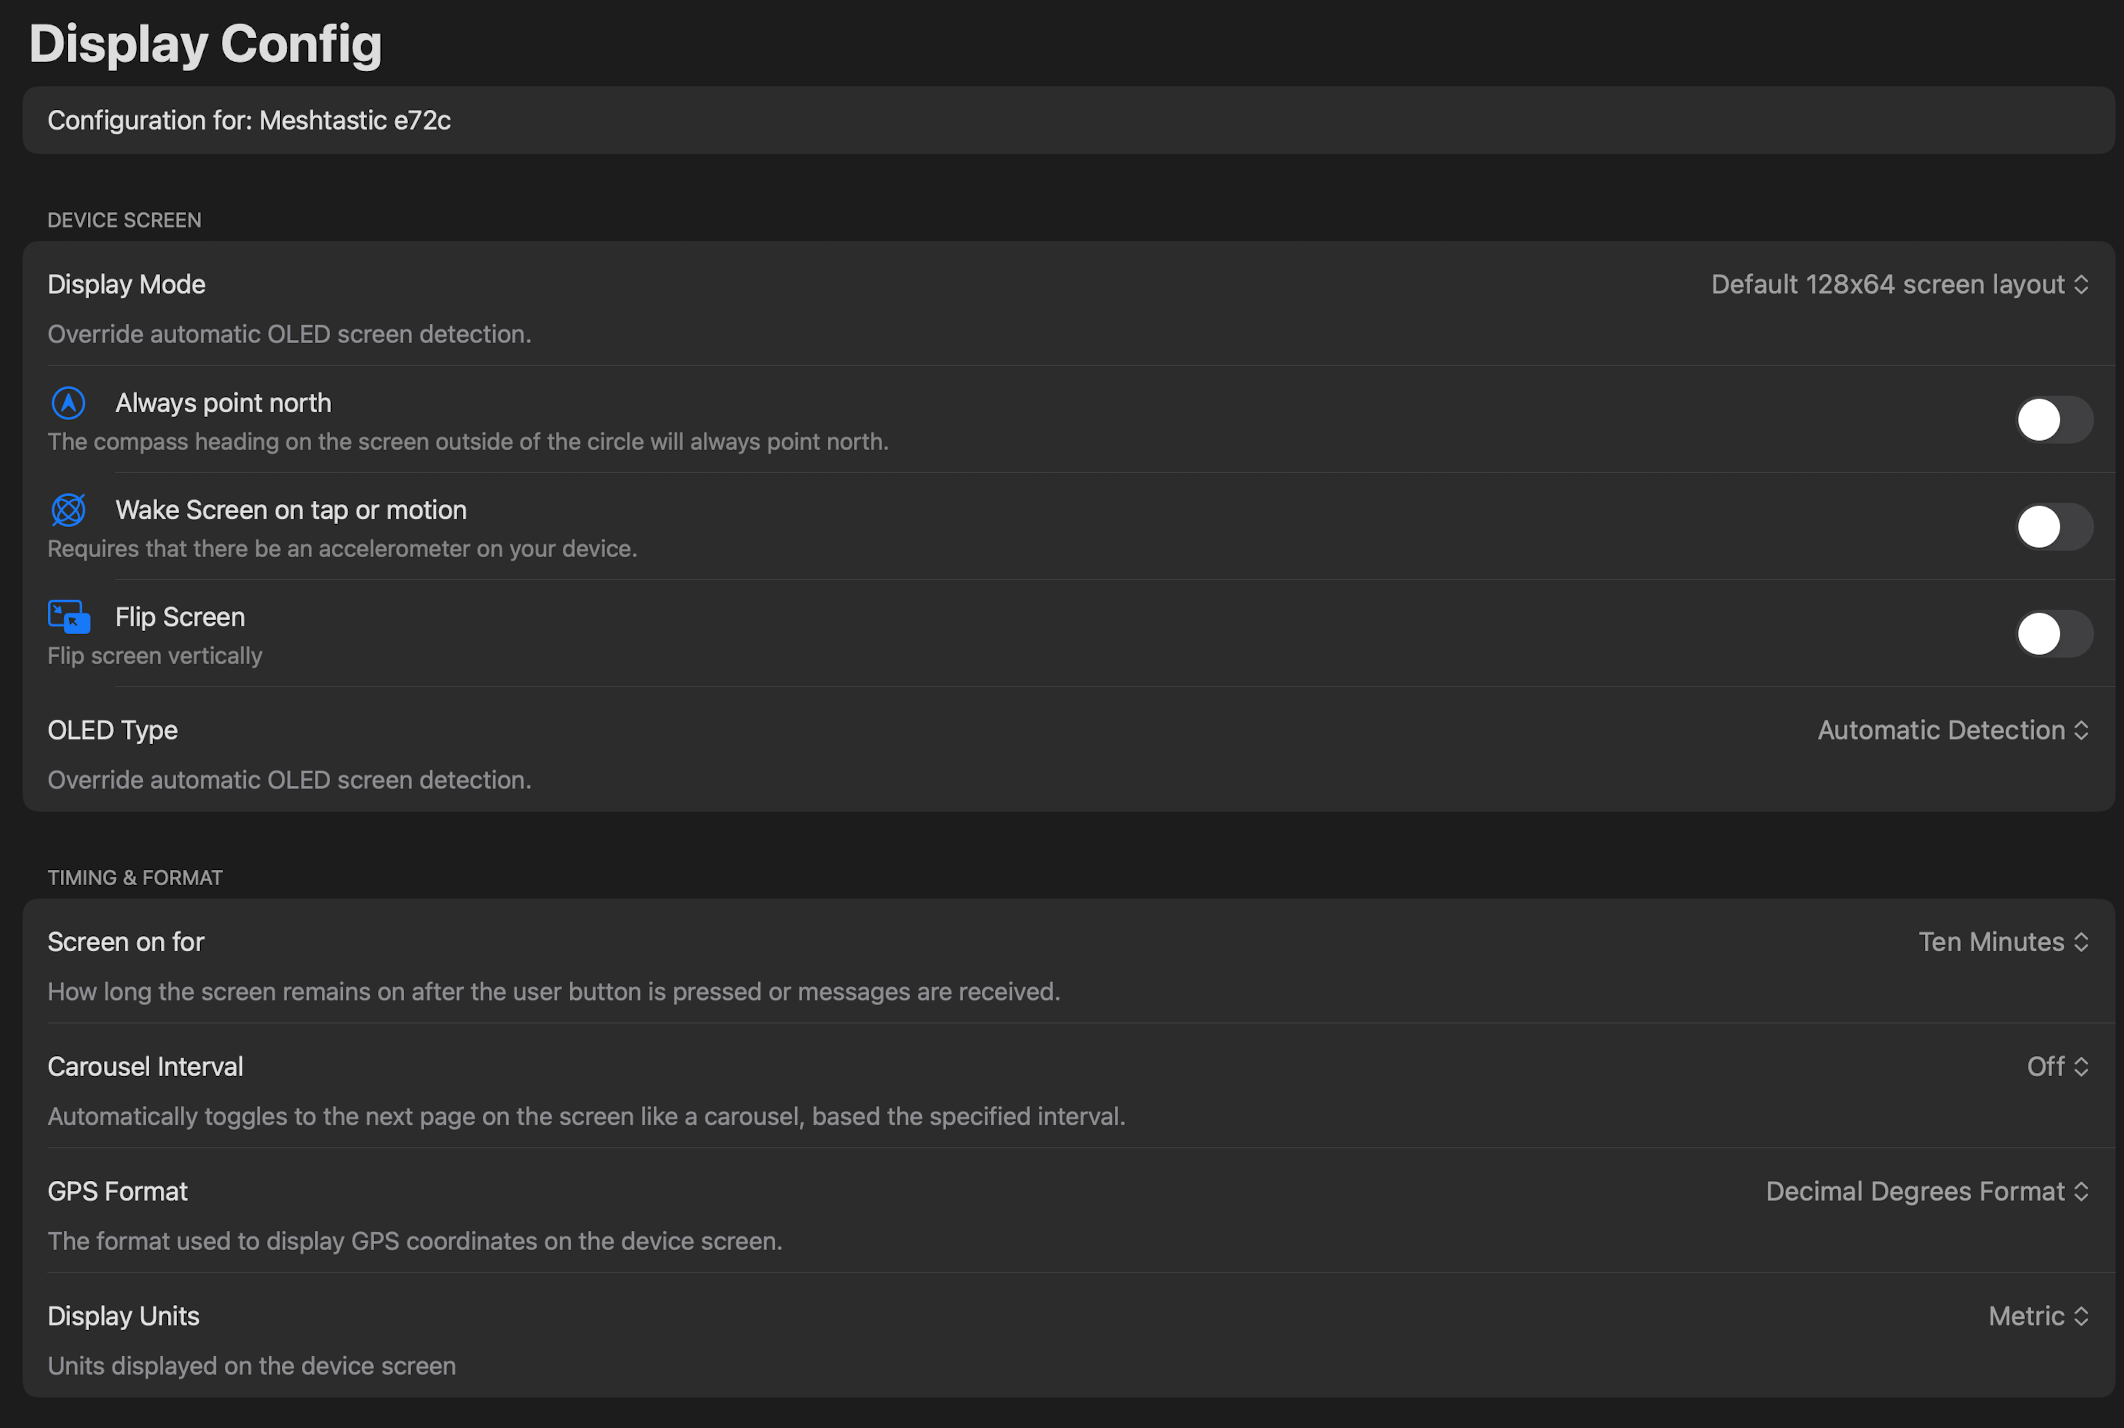
Display can be left alone, unless you want to invert the screen for some screen models:
Network is only useful if you have an ESP32 or similar device with wifi (Lilygo T-beam):
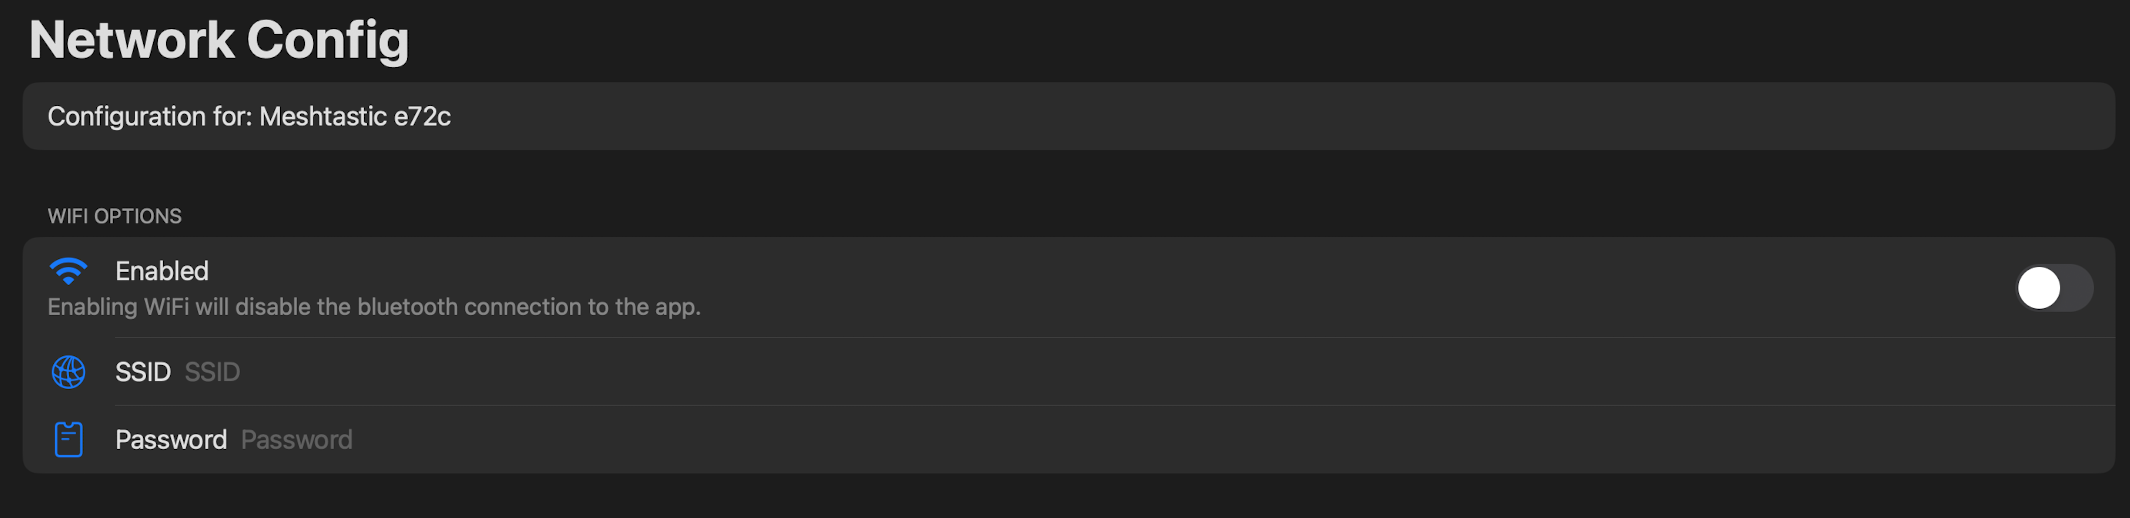
If you lose the wifi connection, you can regain access to the unit using the serial connection part of the Chrome process.
This can be useful if you have a device far away, but with internet access.
It is also the only way to get a csv file of range test information should you decide to do so.
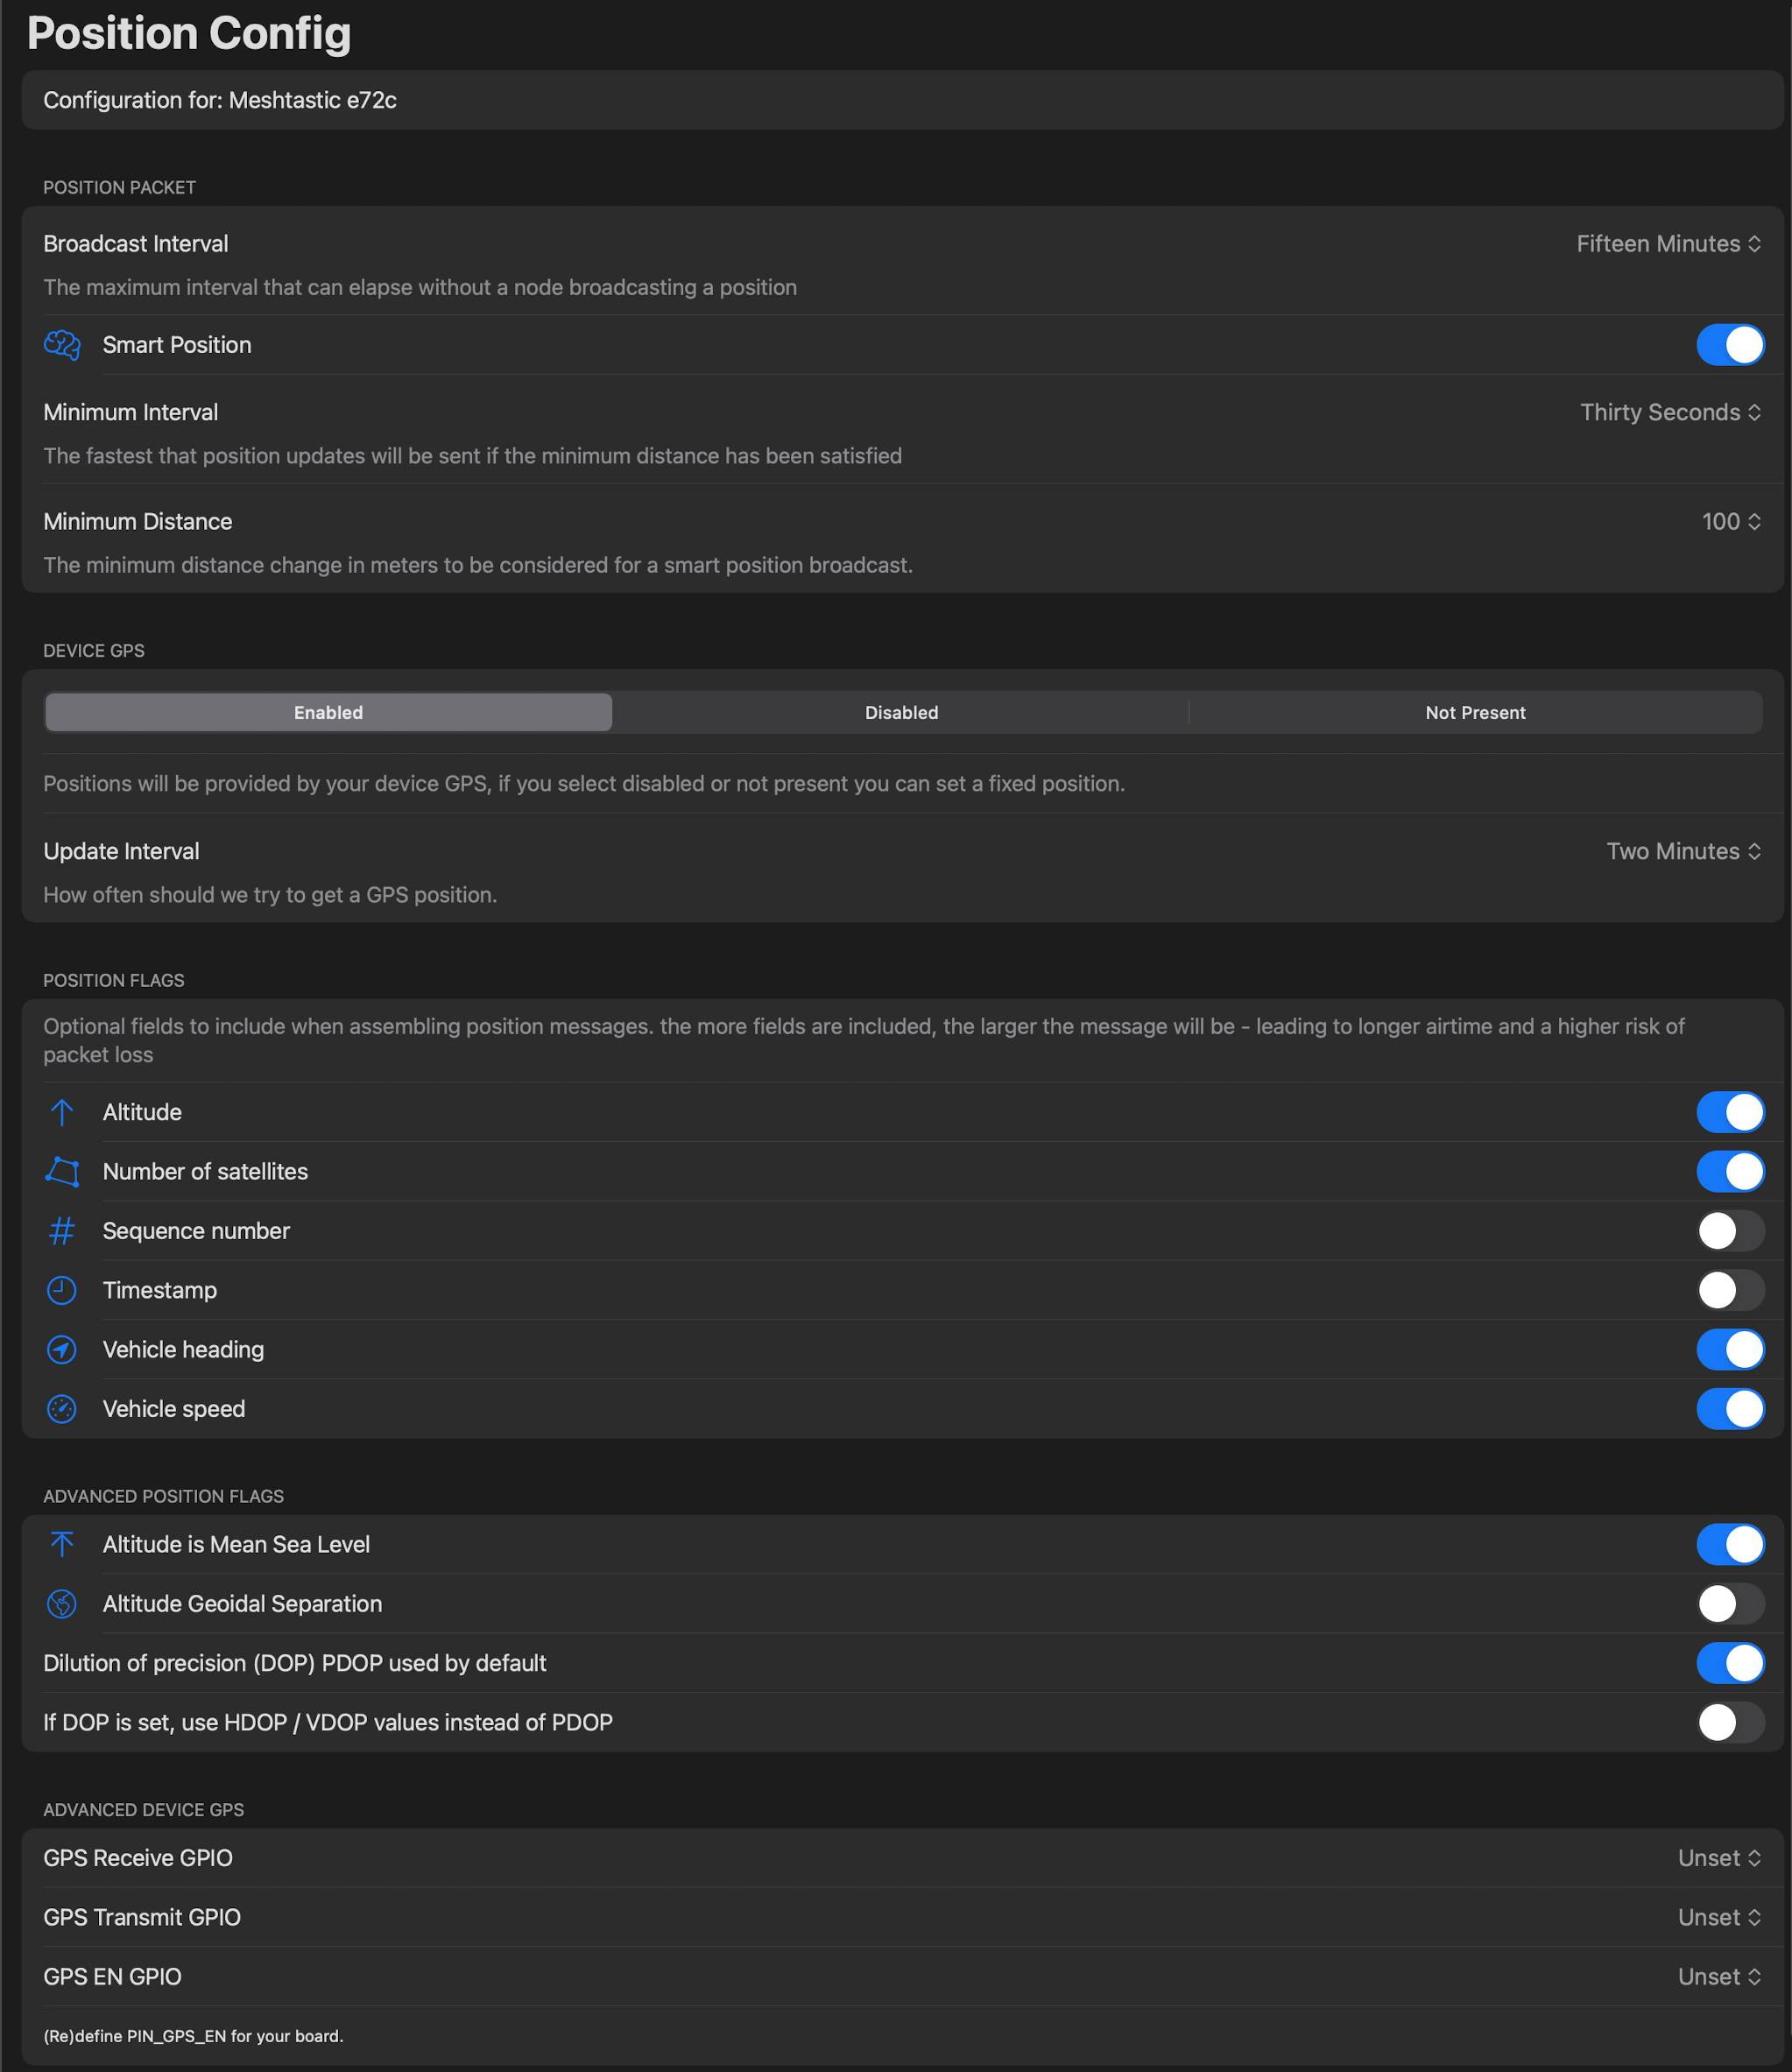
As you can see next, this device has GPS. If it is present, enable it. If not, you can choose "not present" and the device will take the GPS coordinates from your phone where you are at that moment. Works well, especially for locating your devices on a map. (see also meshsense)
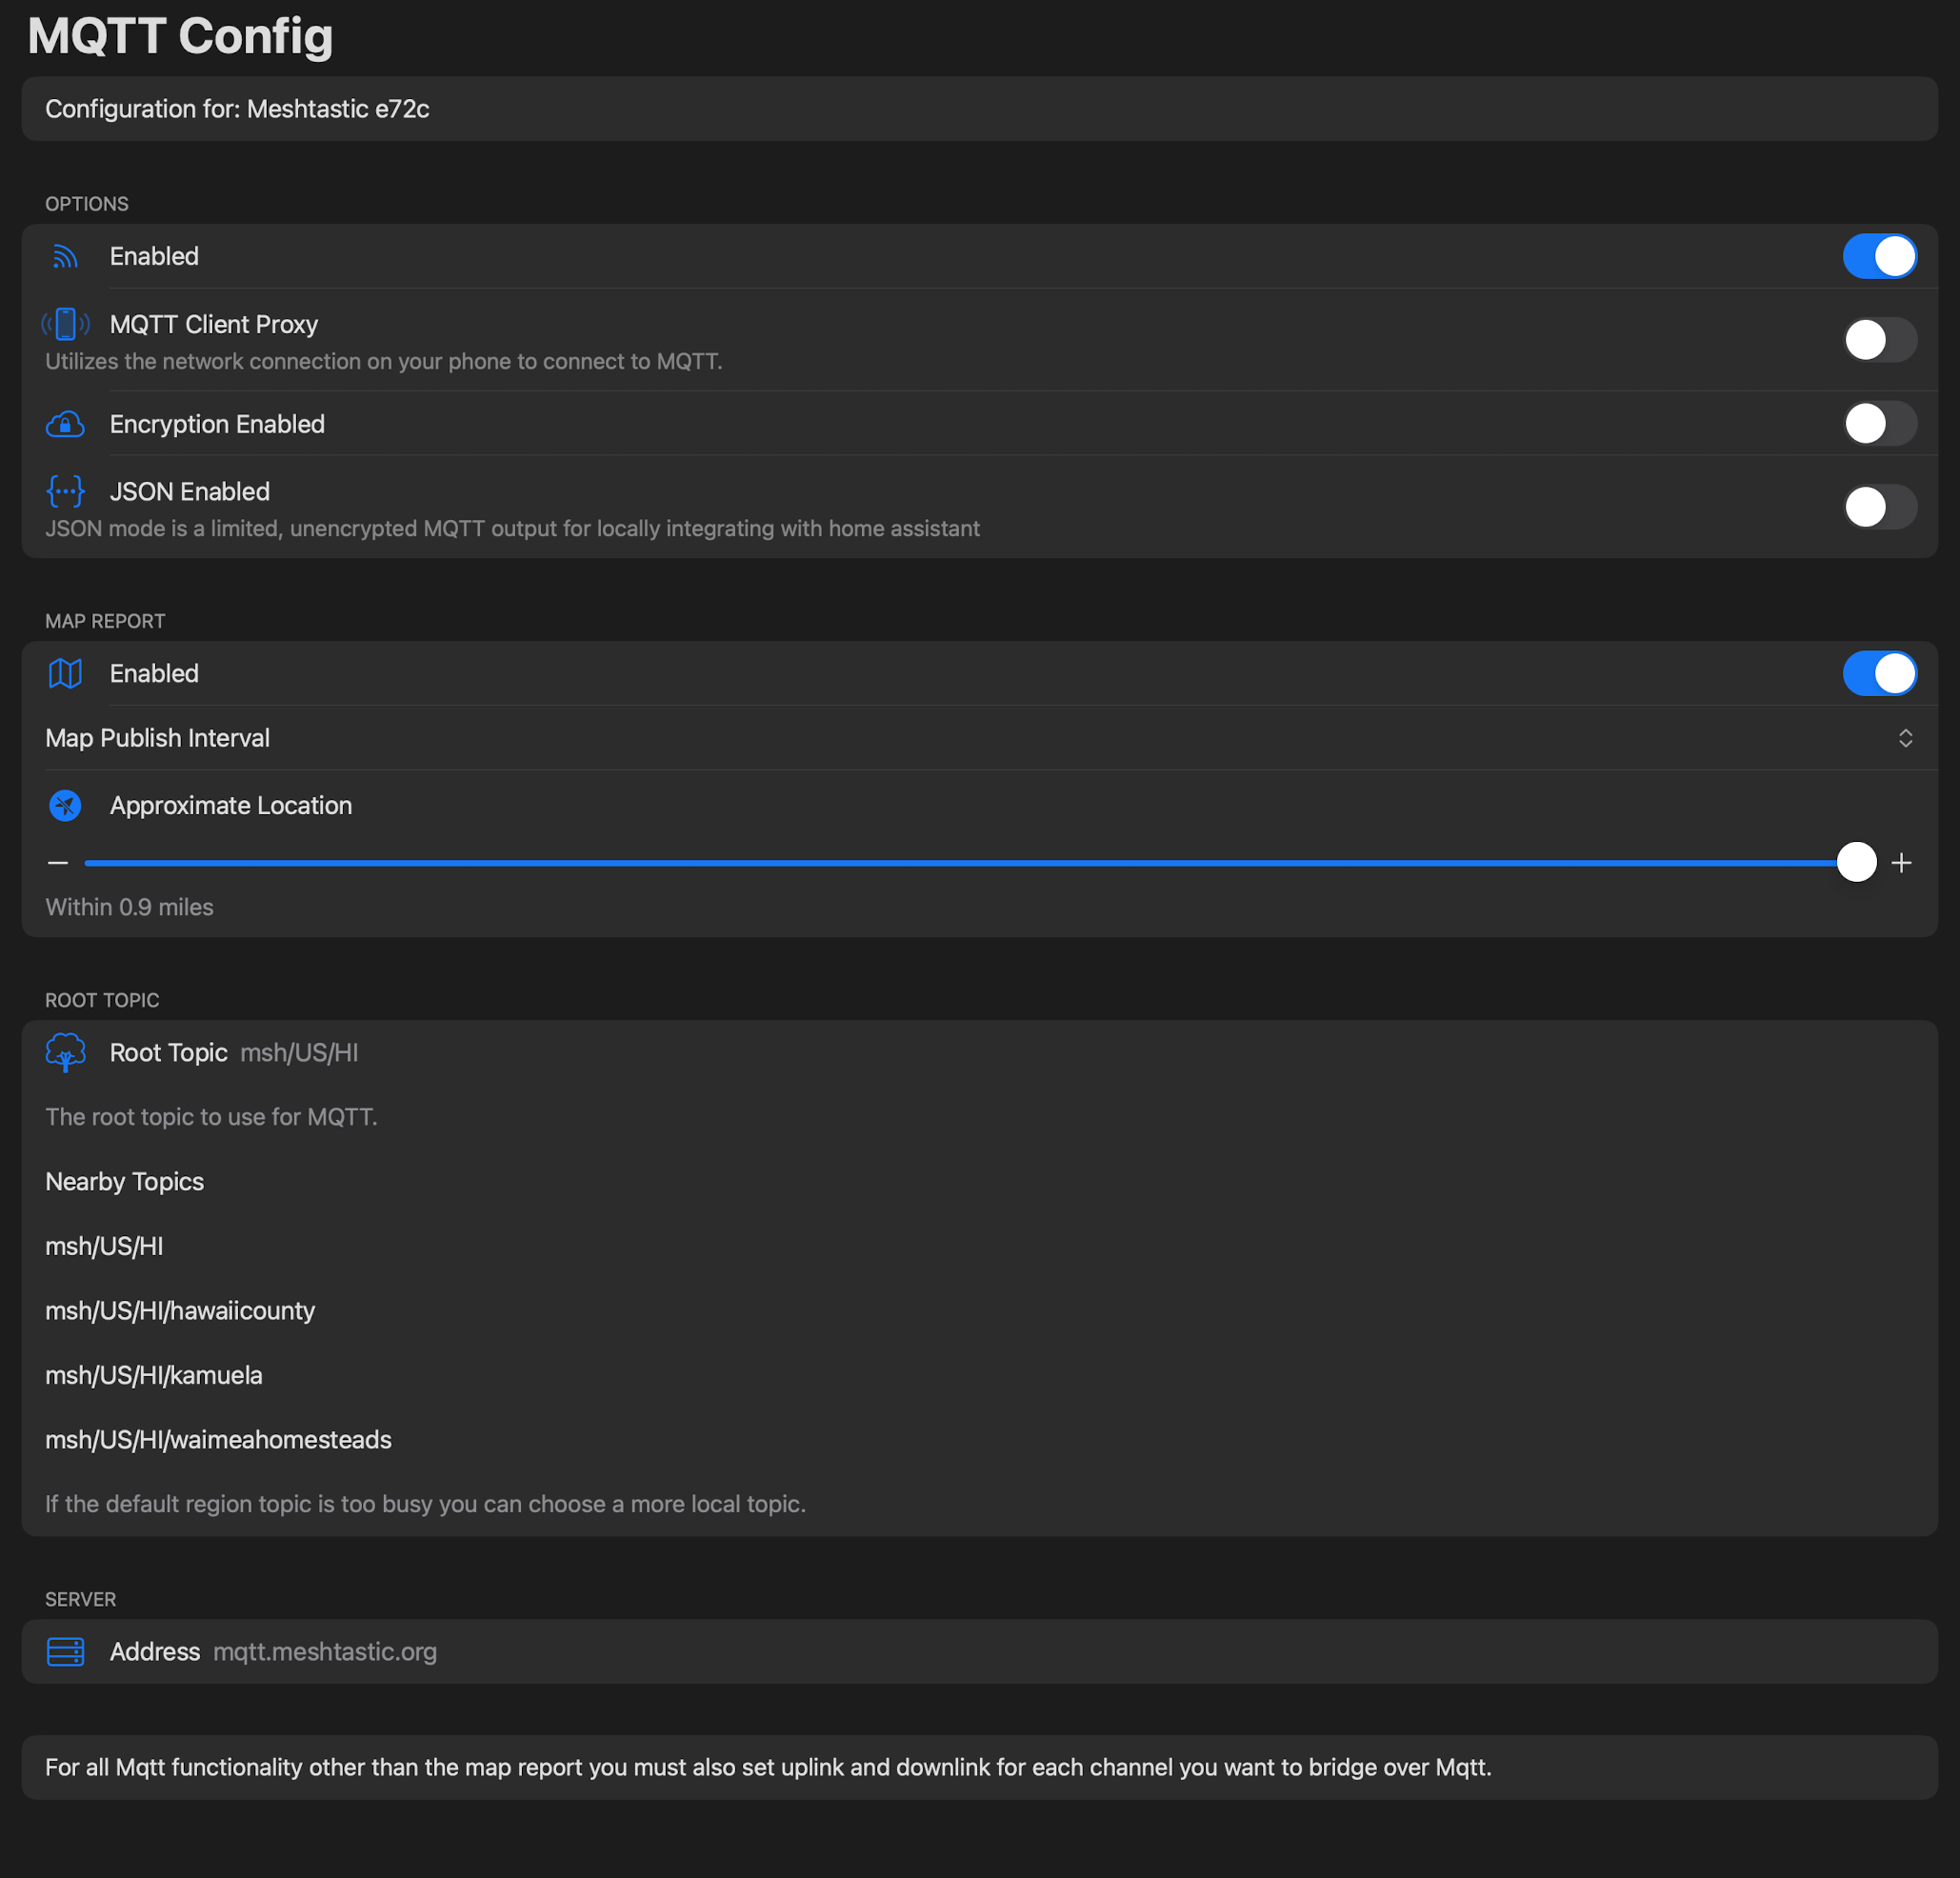
From the top: enable MQTT so your traffic can use MQTT servers to share messages.
Make sure uplink and downlink are also enabled on the channels page, and OK MQTT is enabled under LoRa.
Proxy uses your phone to connect to the MQTT server if you are not in range of any MQTT gateways-this works for solo users testing devices too.
One cool use for this is imagine you are in a remote location with many mesh users, only one needs to be using their phone as a MQTT proxy to get EVERYONE onto the MQTT server network.
Encryption off enables your traffic to be seen by others, but not a big deal, The impact is really to make your messages go through, change later if needed.
JSON is only for home automation, leave off.
Enable the map and location.
Root topic is like a filter: you don't need to communicate with the US mainland, so I use the smaller "scope" of the MQTT server you see on the image, e.g. msh/US/HI.
You can also join other MQTT servers, like those sponsored on the web, or even your own if you want privacy.
If you want to see traffic, you can use many free MQTT explorer programs, just enter mqtt.meshtastic.org, user name meshdev, and password large4cats.
Cool stuff, you can see your own traffic.
Note the comment at the bottom-none of this works without enabling uplink and downlink in Channels above.
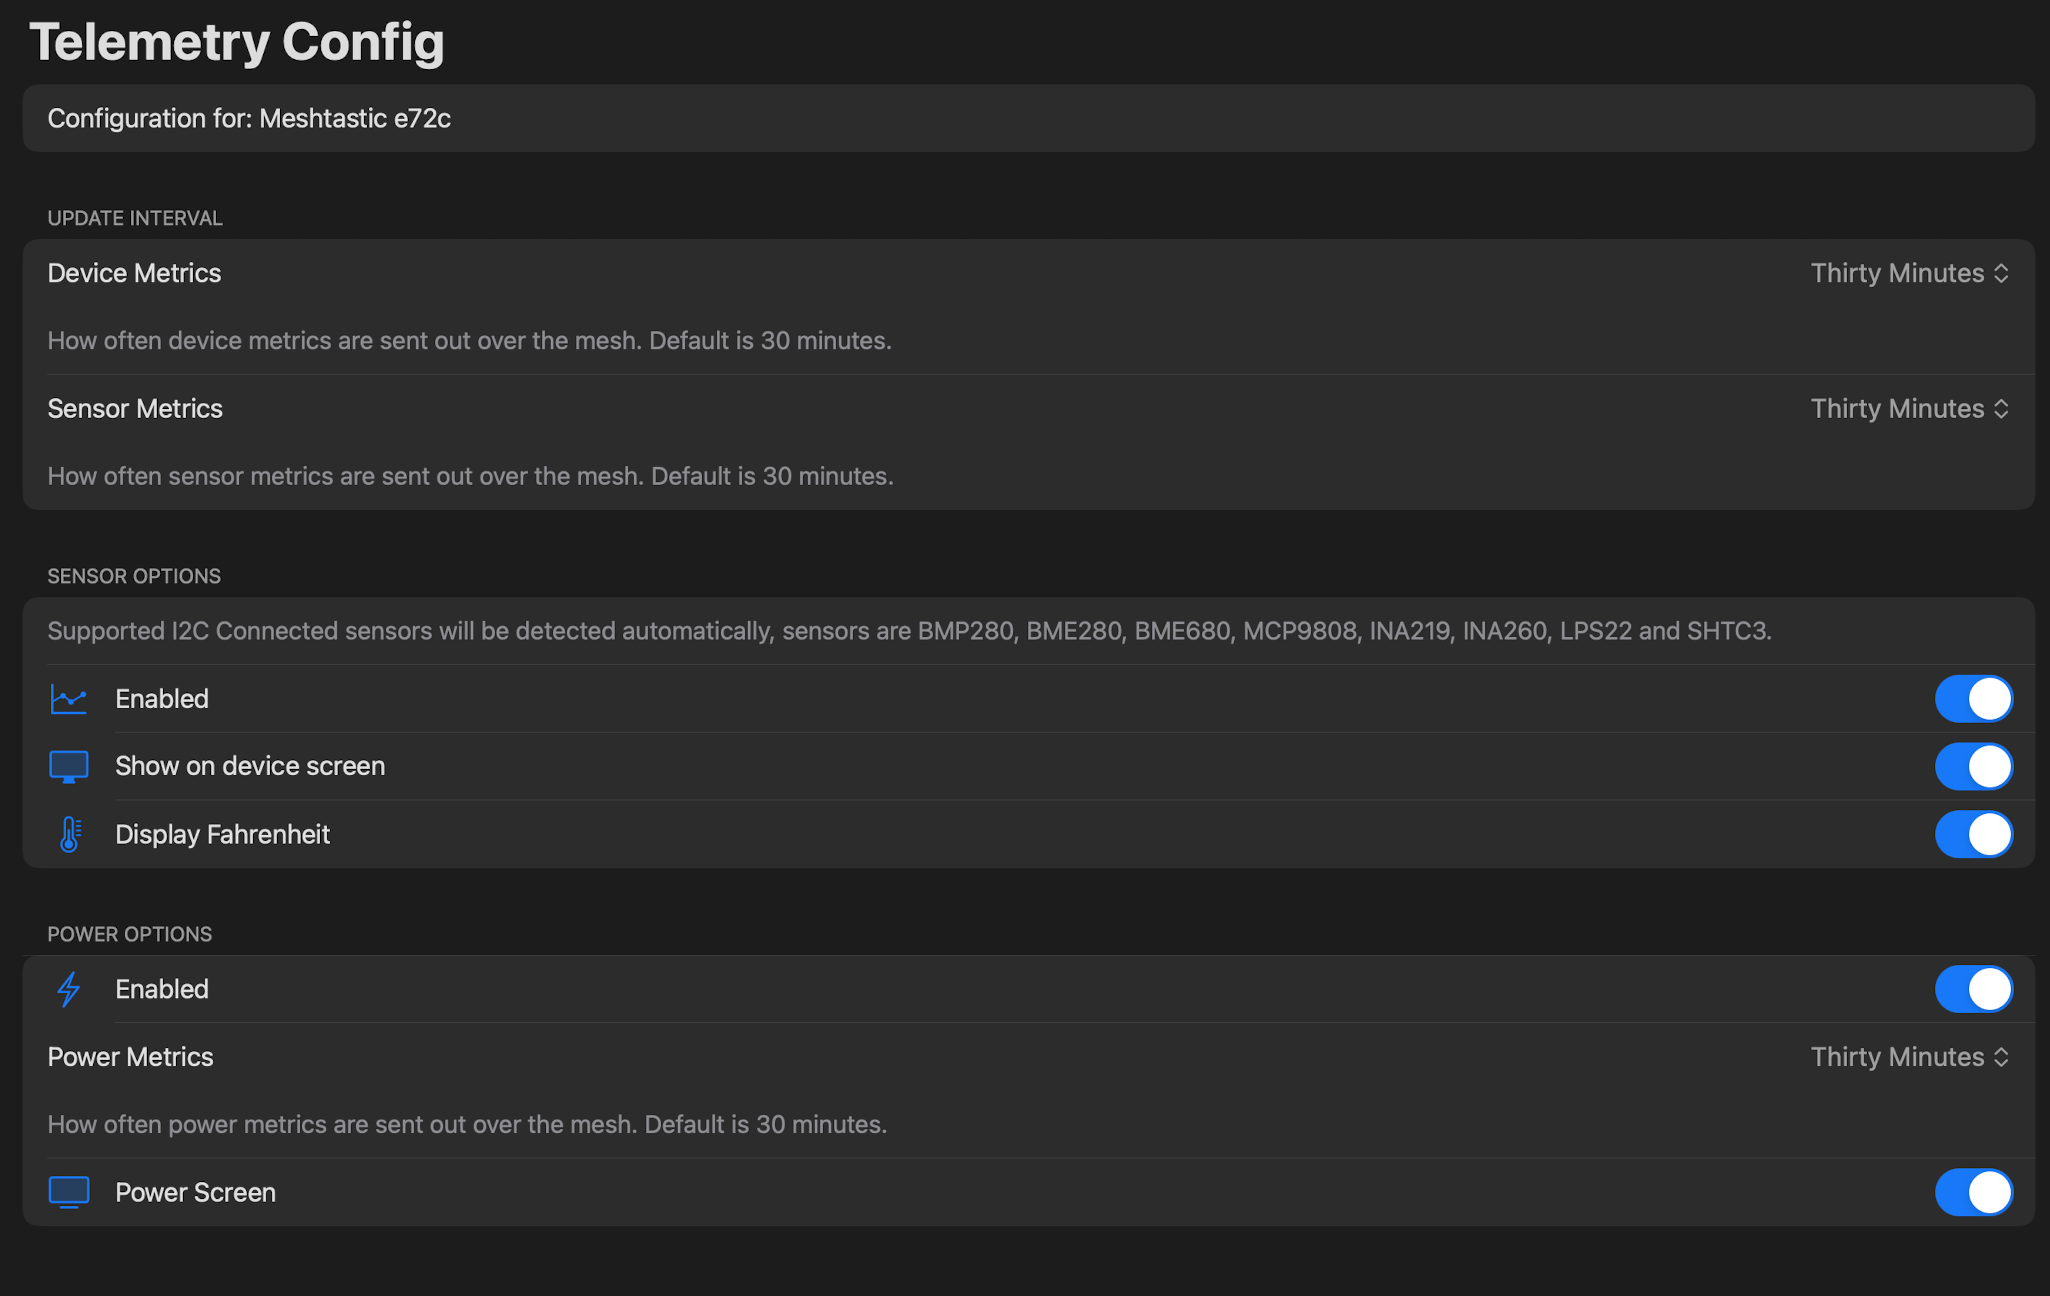
Telemetry is only for those with devices with sensor, but is really useful:
Chrome setup: Serial connection
We will be using a USB-C cable to connect a new ESP32-S3 unit to Chrome, on a mac. PC versions are similar, you may need help on the meshtastic site for drivers (ugh). You may also have a device with micro USB, cables vary on these.
Step one: open Chrome:
go to the meshtastic site, and download the flasher: https://flasher.meshtastic.org/
select target device (you can try auto, but it is not reliable):
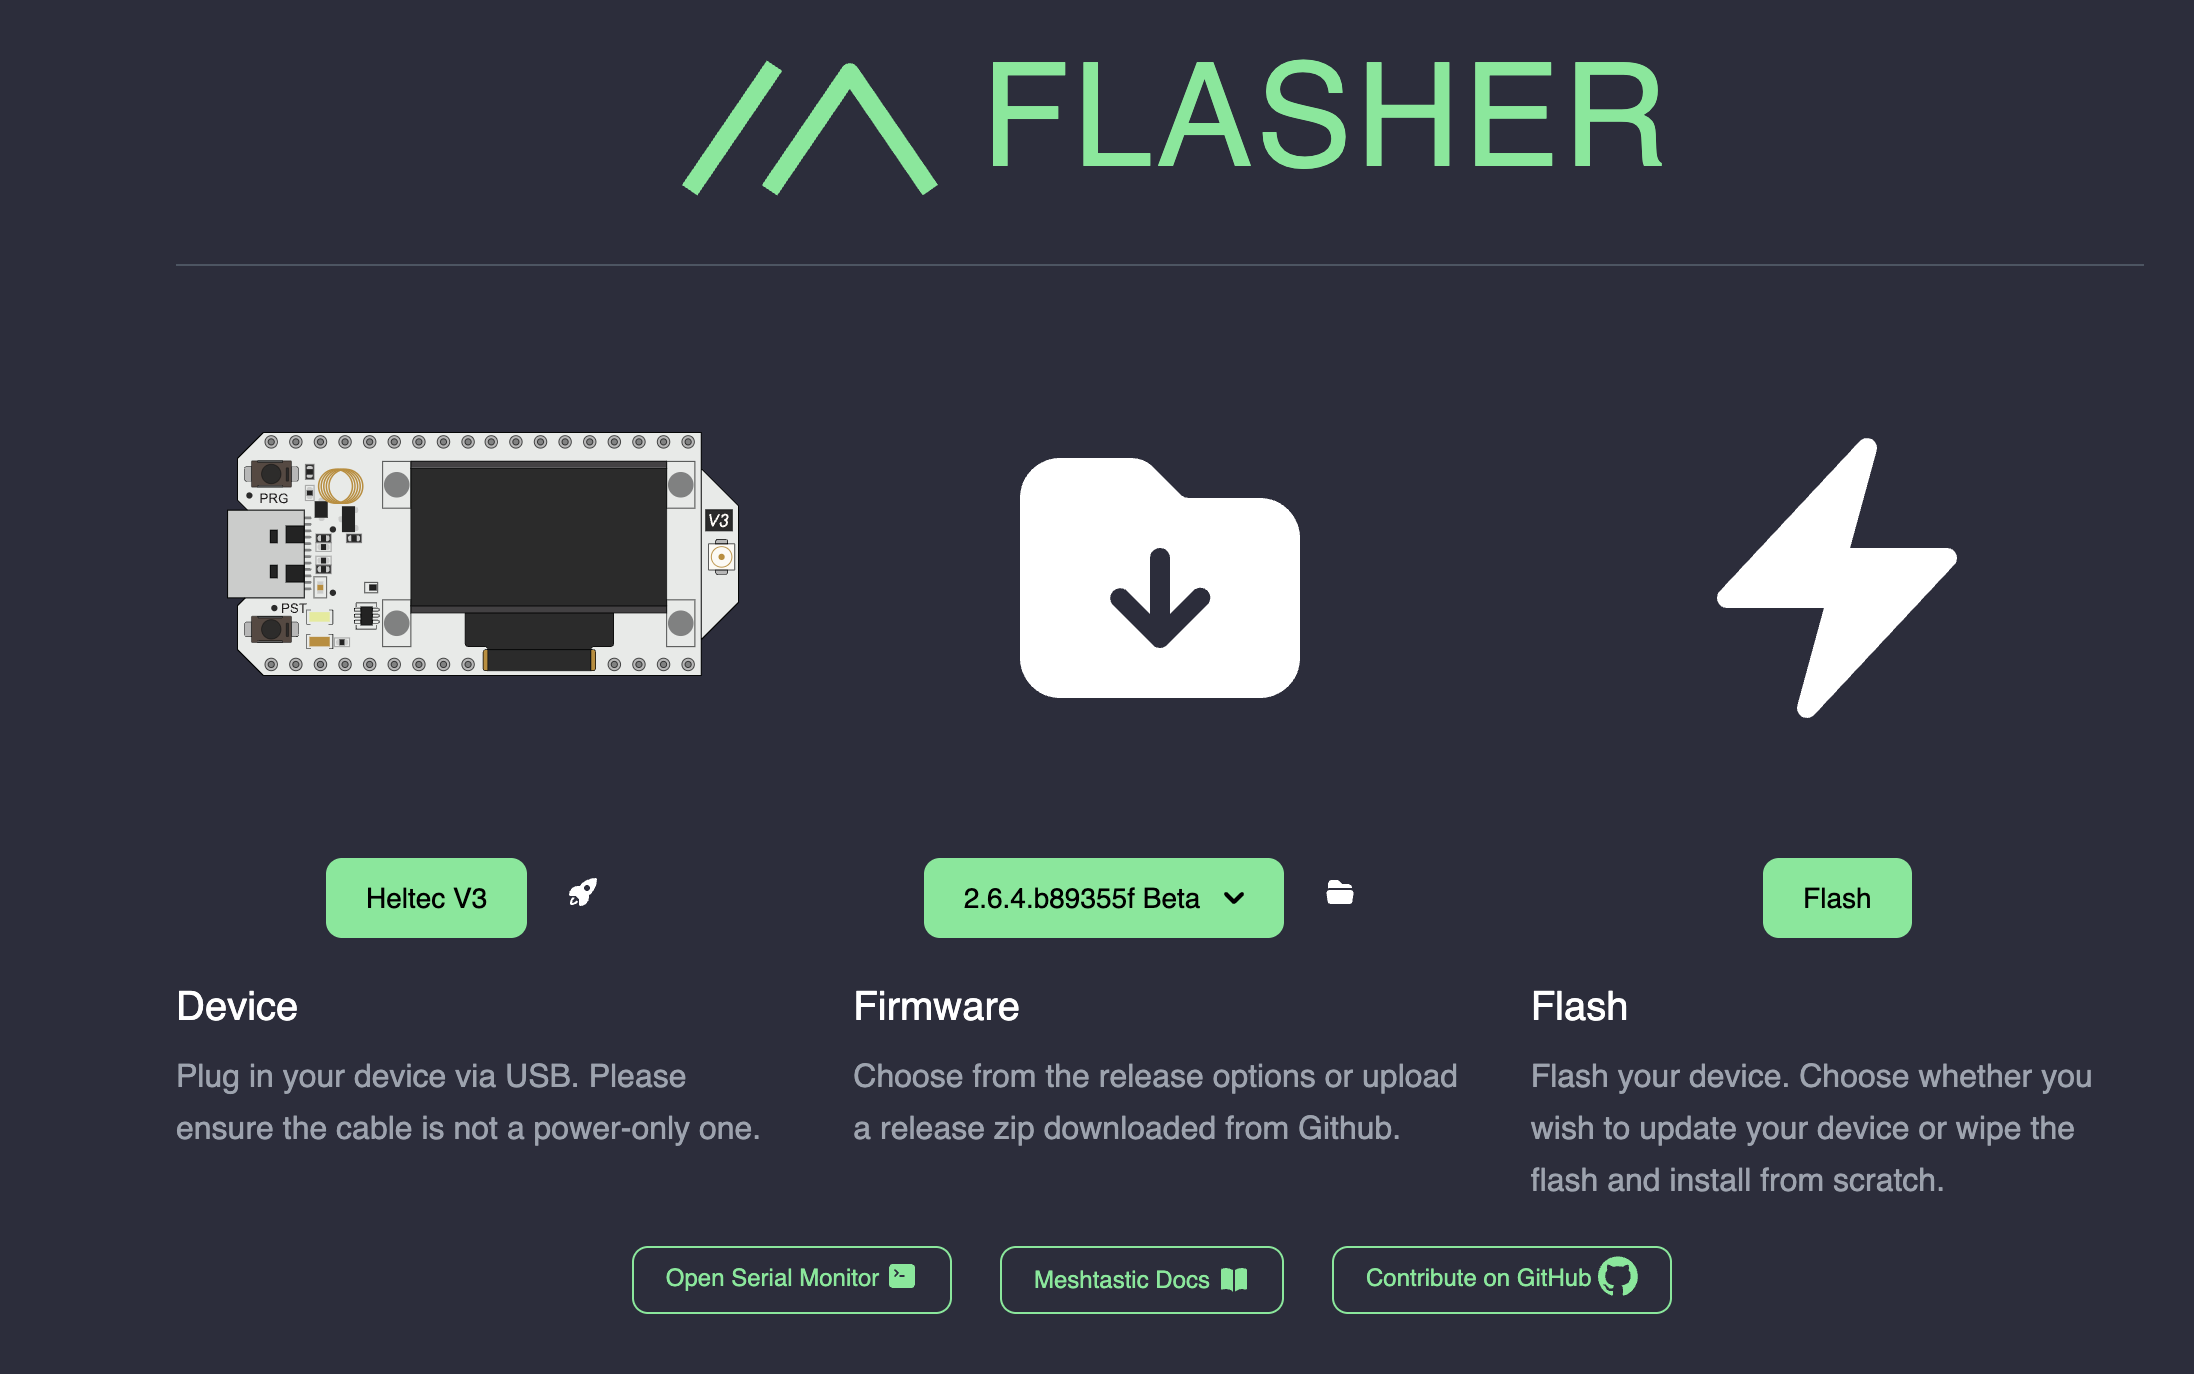
You can see I chose the Heltec V3, which matches this unit. You can choose beta or alpha software, up to you. If you want web access, you have to include the web package as well (see below):
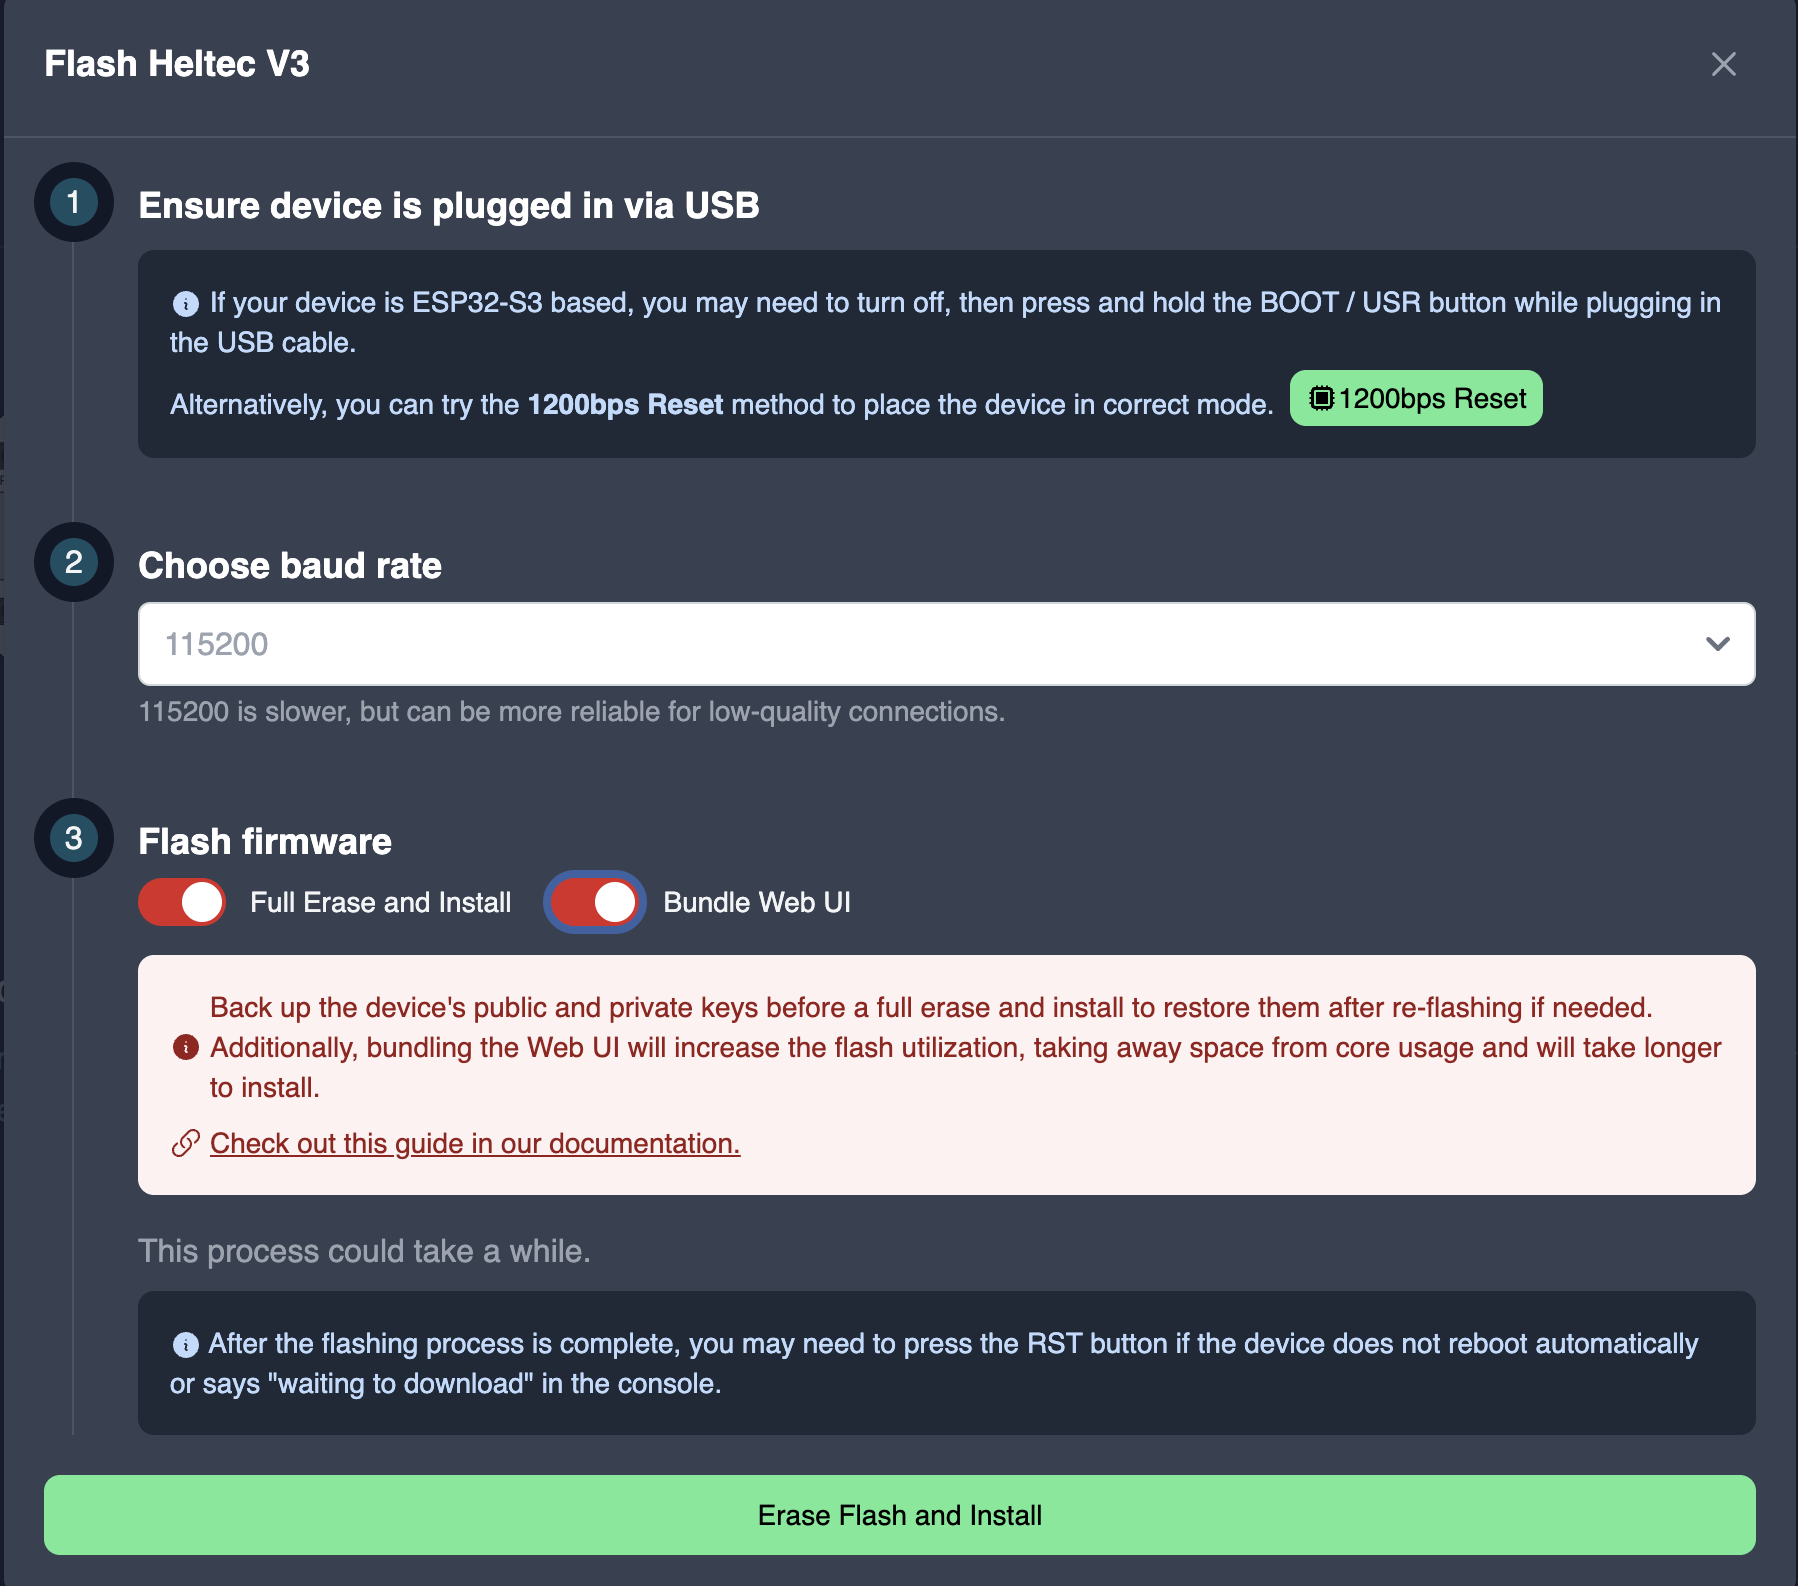
Some devices run just like it says, others you have to play a "plug and connect" dance.
In some cases (RAK) the device shows up as a drive on your computer, where you drop the firmware file.
Either way, it should show up in the devices menu of your computer:
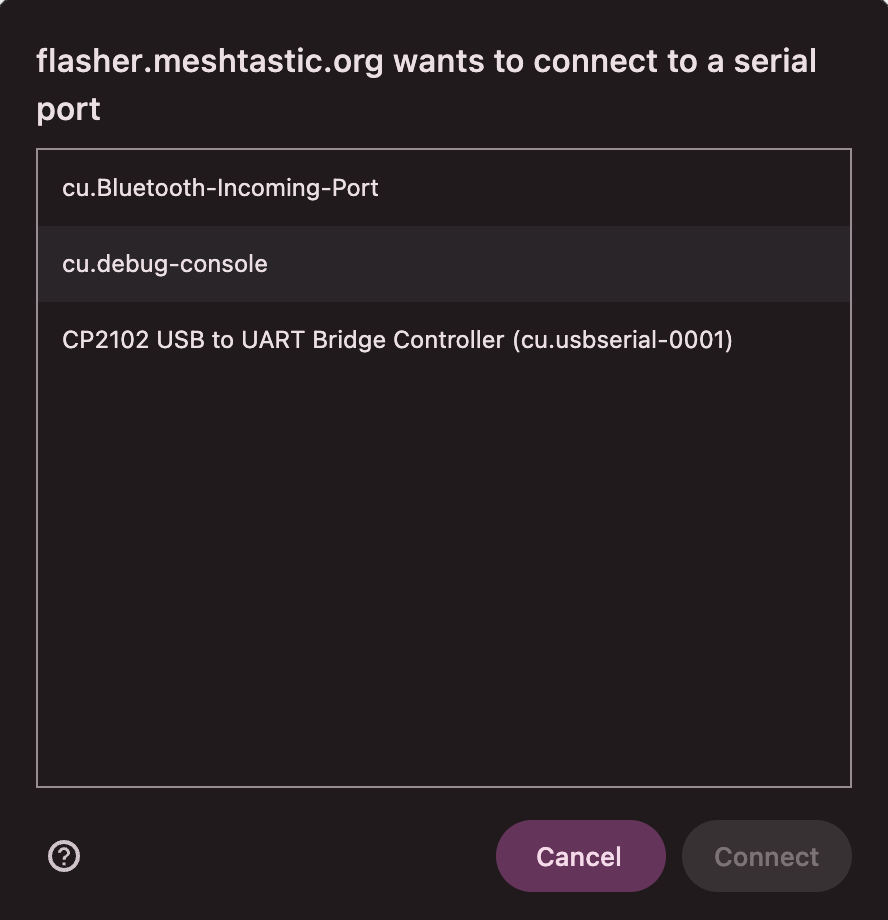
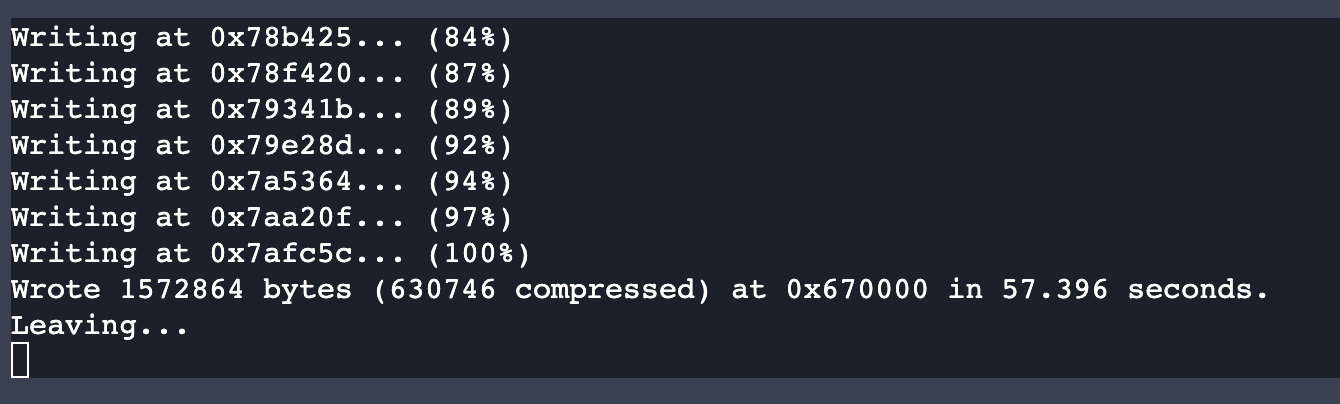
This may take a minute or so, when done it will say "leaving" in a petulant tone.
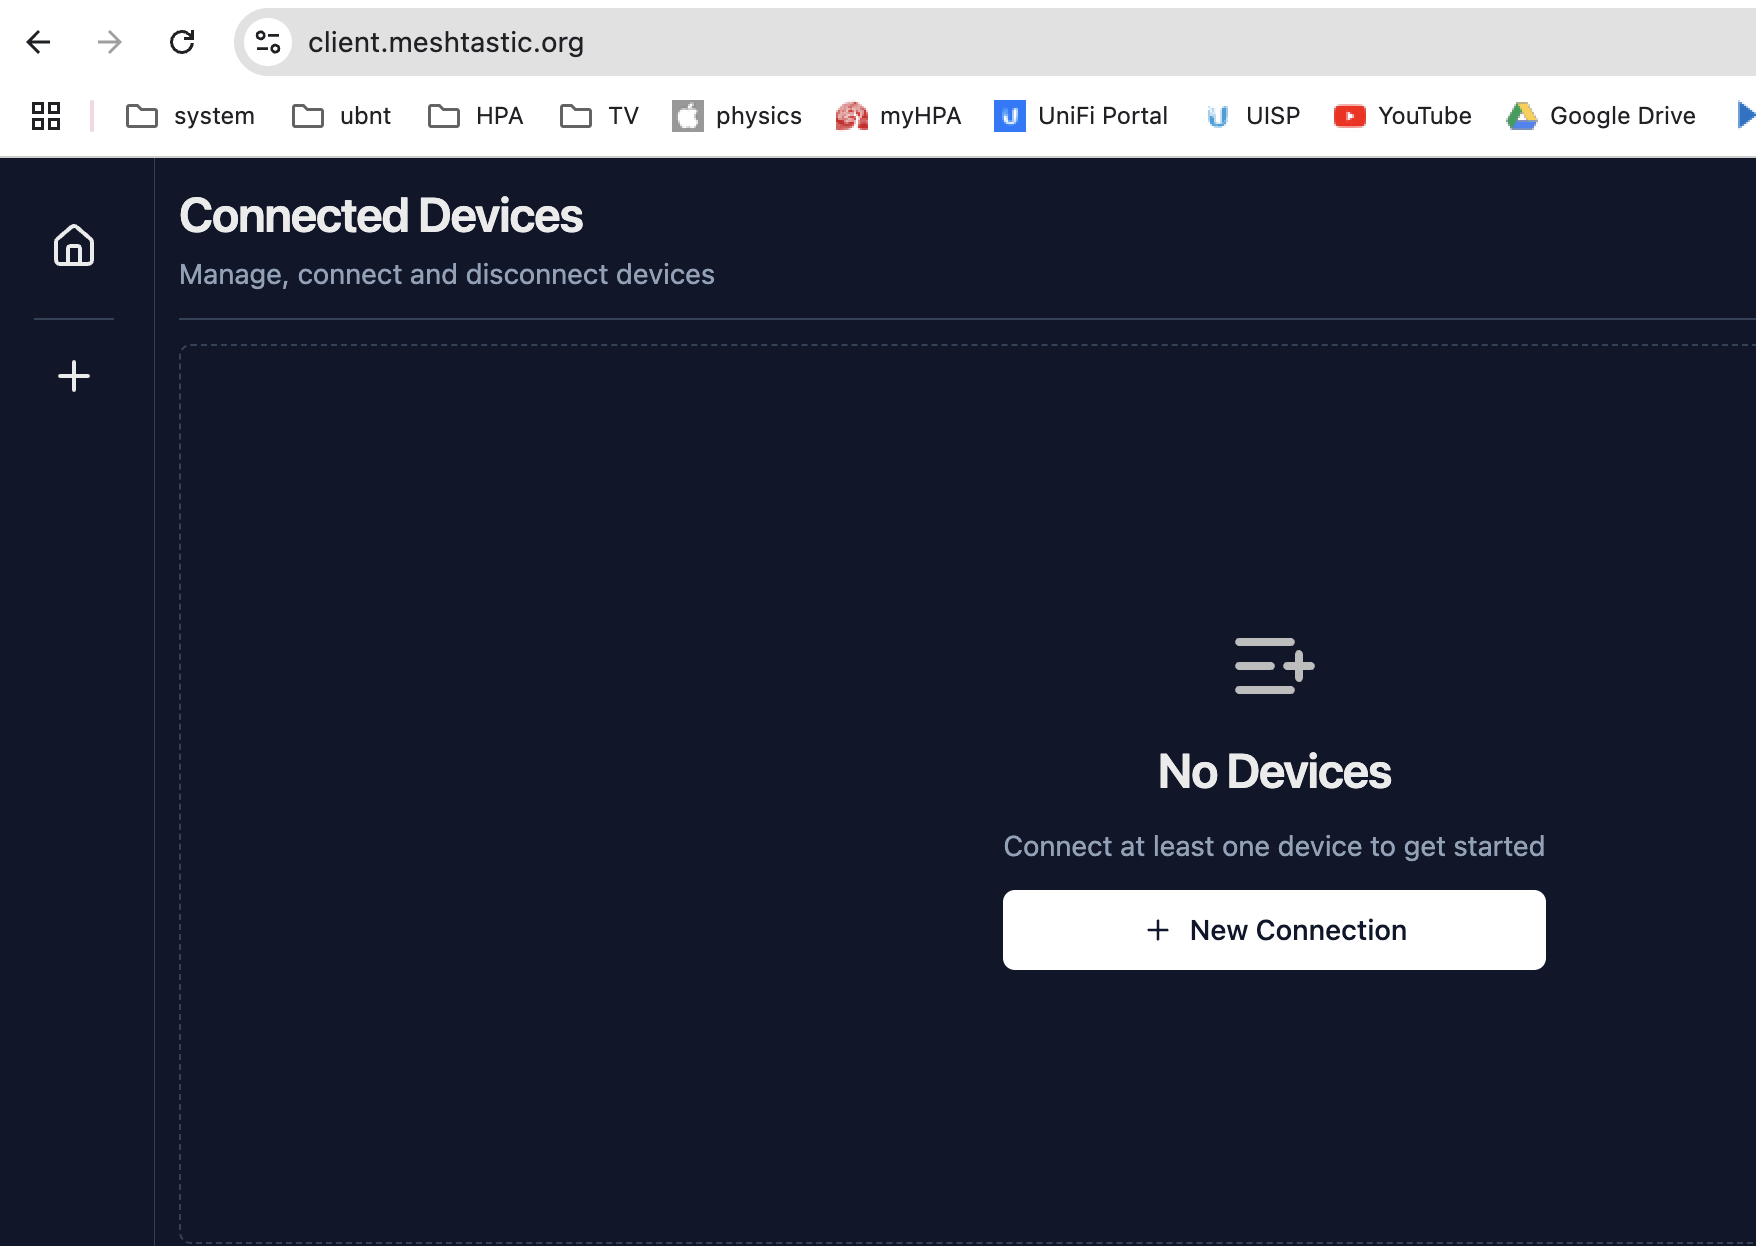
Once done, go to client.meshtastic.org on chrome...
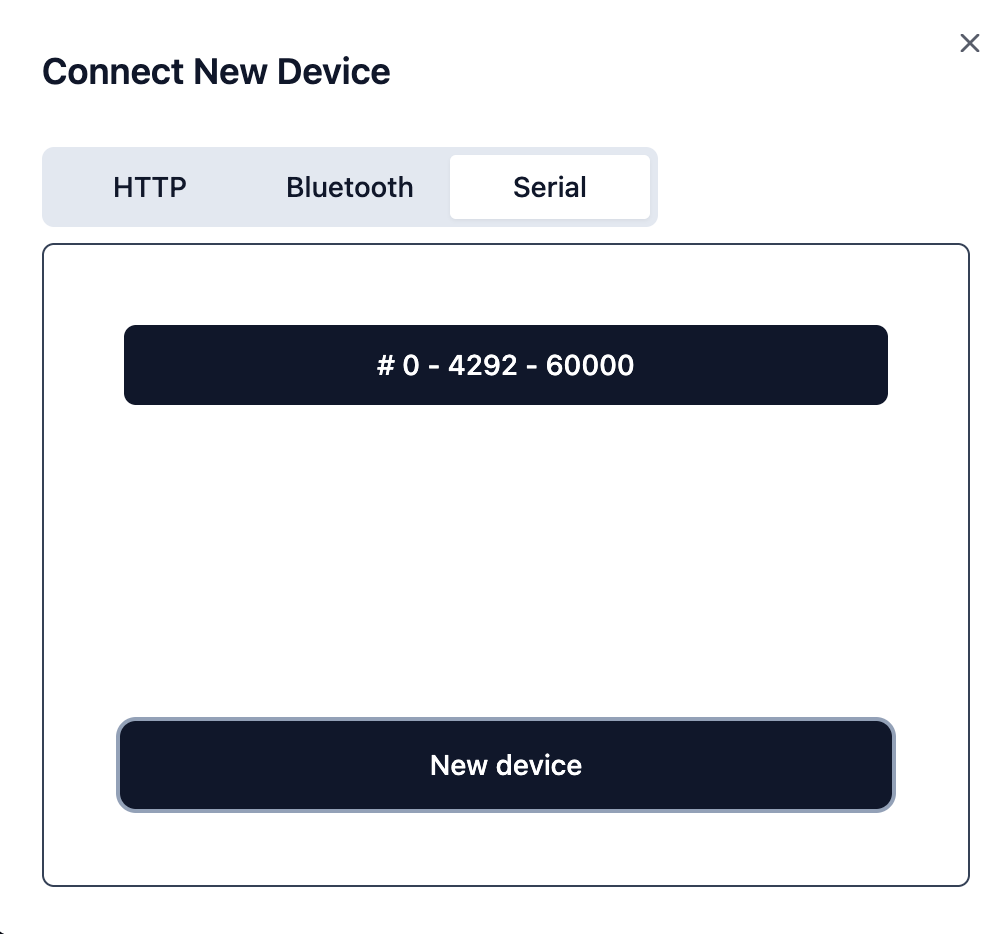
choose serial, then a box should appear with devices, if not, search again:
Nice stuff here:
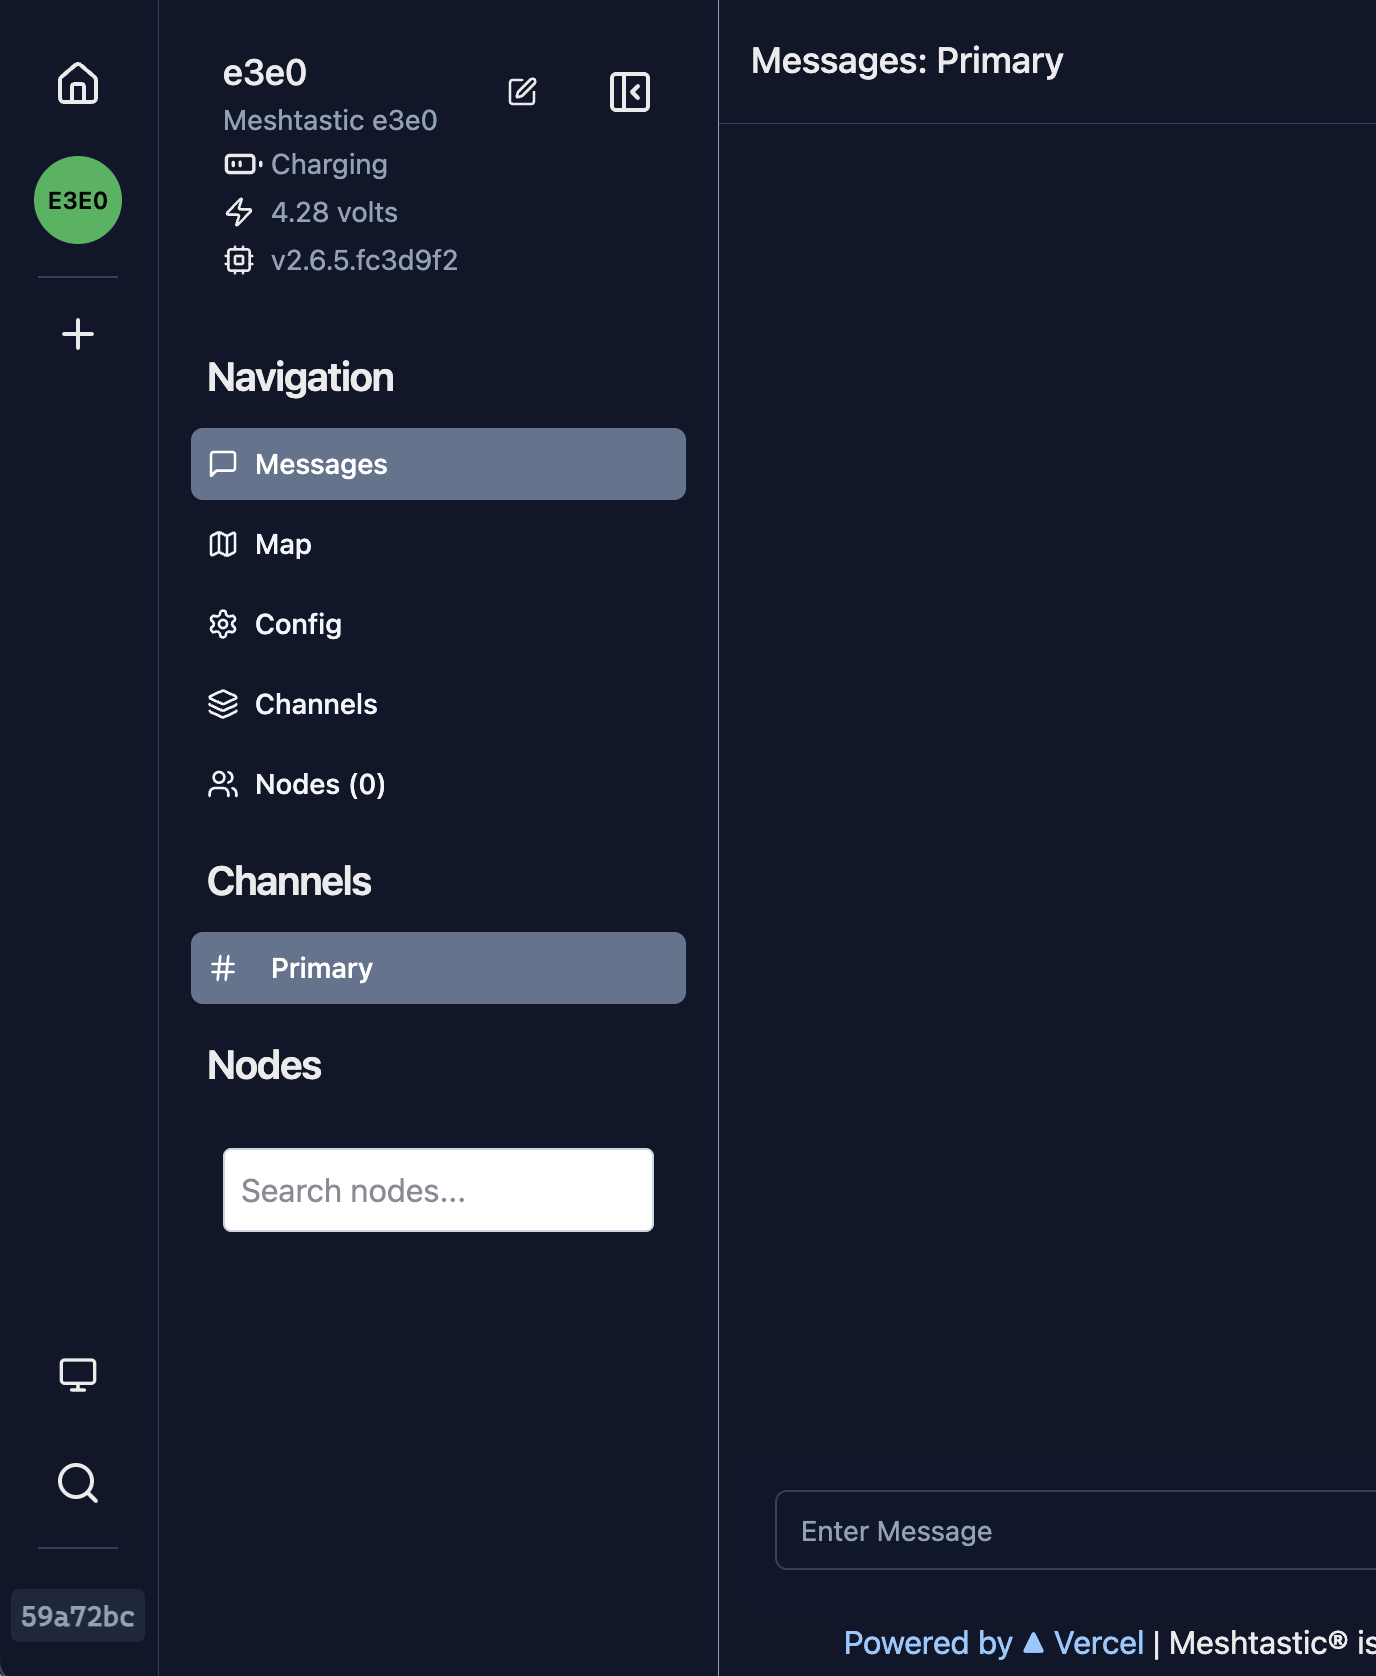
- Same setups as above, main difference is this method ALWAYS works, even if you have disabled bluetooth.
- This is the only "rescue" way to connect to a unit if wifi is enabled and you lose wifi access.
- You will also notice the map is much more detailed and includes some fun graphics:
- When you make changes, click the drive icon in the upper right.
- You may also notice that on some units, bluetooth does not work if you are connected by serial.
- If you use your computer to charge your unit, make sure chrome is off, this solves the issue.
- You may also notice the long wait between changes and reboots when using the meshtastic app over bluetooth is gone-serial is instant.
Meshsense:
Meshsense is the best tool for managing multiple units, as well as deep info into your own mesh unit.
It is NOT a configuration utility, though it can read config files for confirmation.
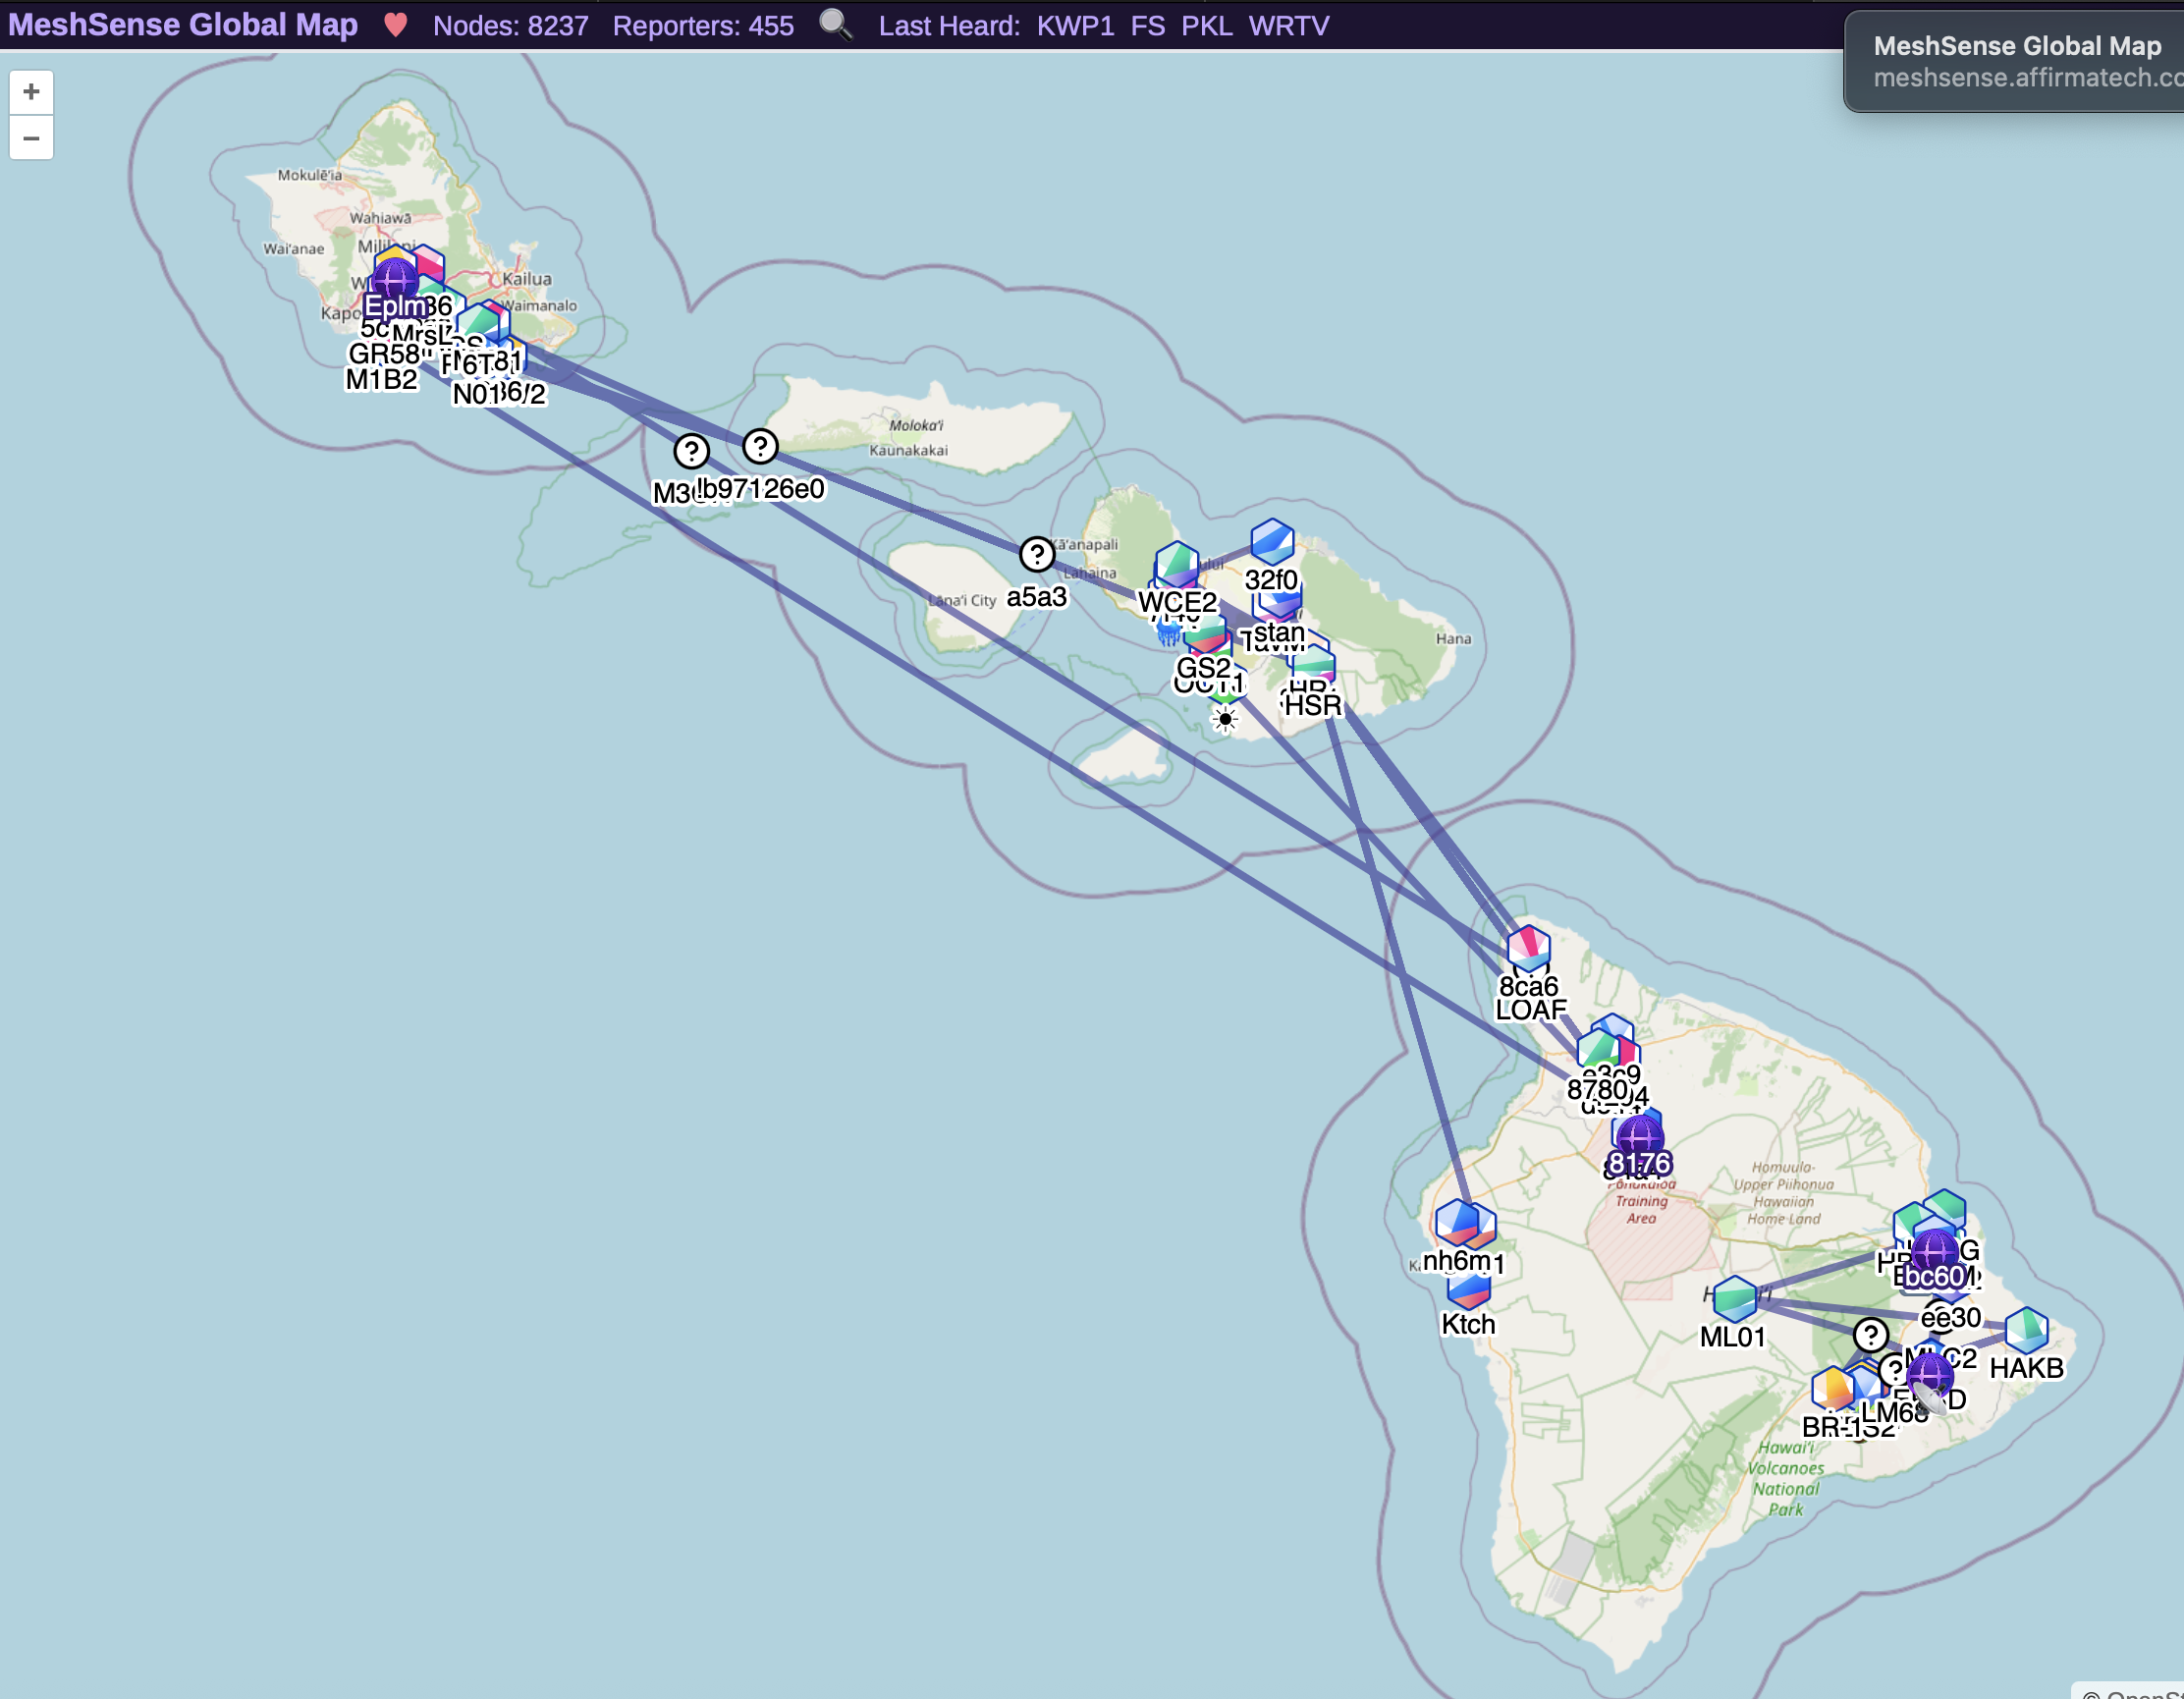
It IS an excellent dashboard for multiple mesh units with links outlned:
Here is a global view of our interisland mesh network as of April 15, 2025:
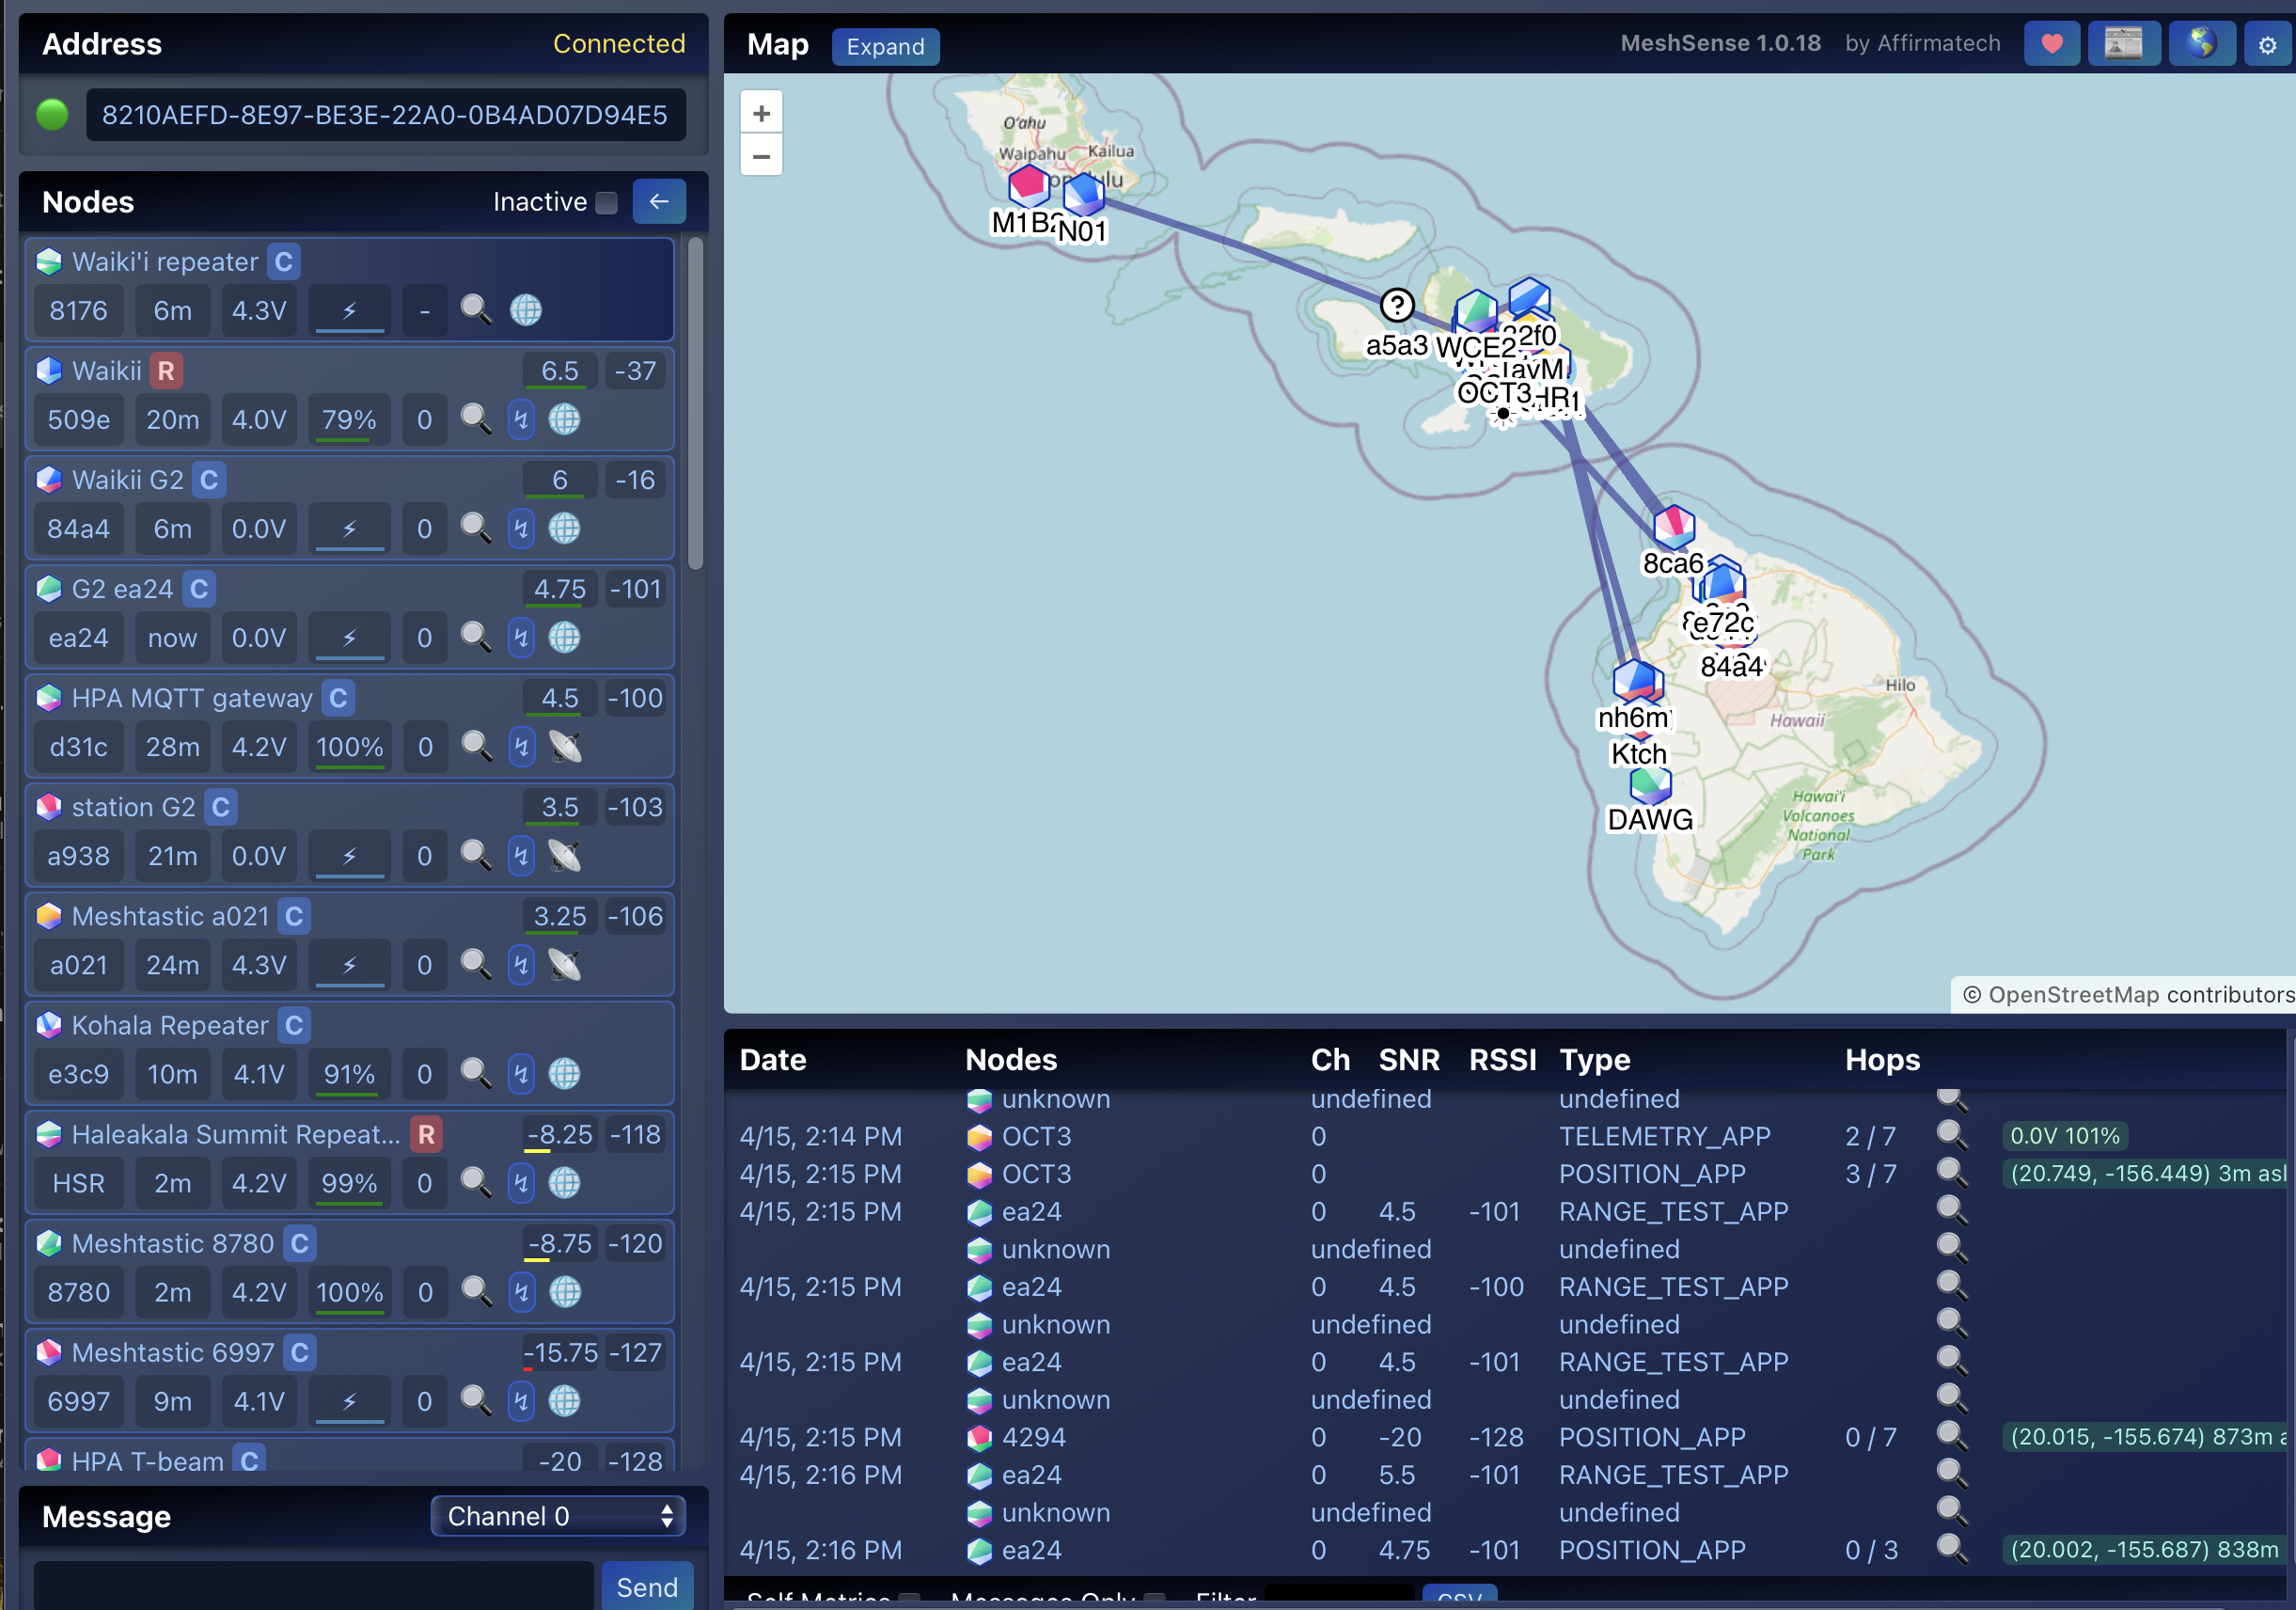
And this is the level of detail available for devices (note, this one is miles away, connected by microwave backhaul):
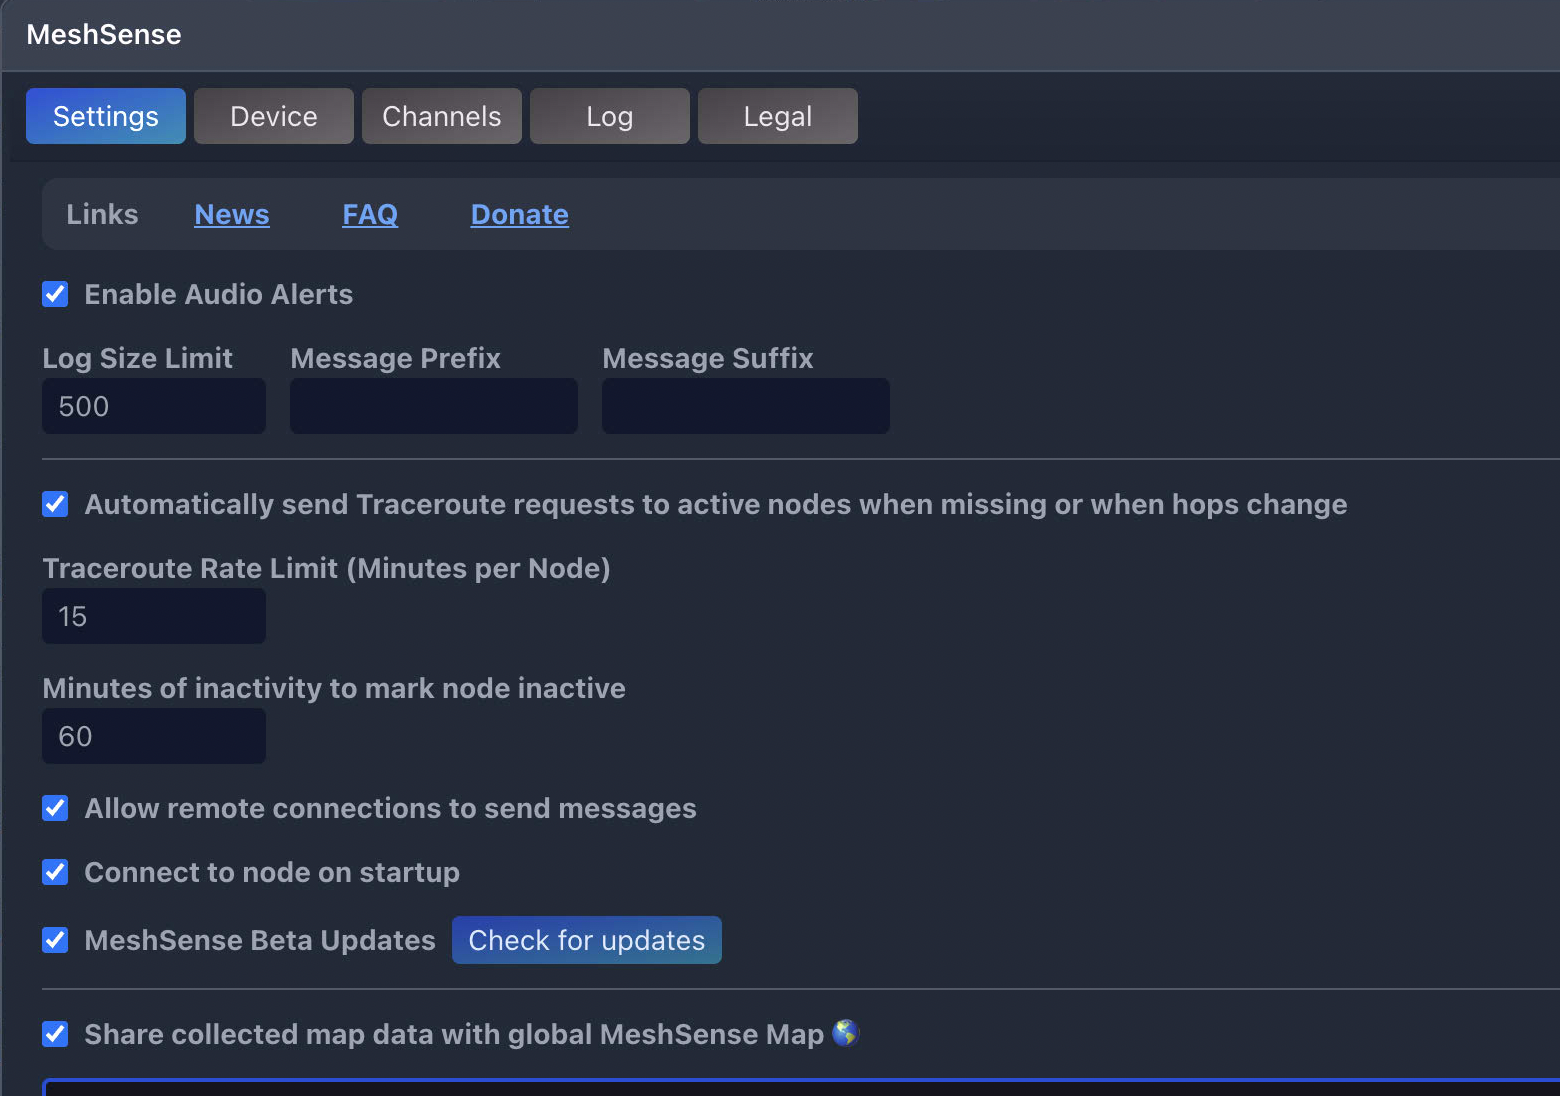
If you are local to the device (not internet or bonjour) you can open settings on the upper right:
Another wonderful thing about meshsense is that it creates its own web server that you can access anywhere on your network, or if you can port forward, you can see this info from anywhere-excellent if you are managing a repeater, router or dedicated client acting as a local gateway.
Future topics:
- remote admin
- adding channels
- encryption
- battery supplies
- antennas
- LoRa background-sensors?
- telemetry
- range maps
Equipment:
Three levels: all should be accessible via bluetooth at least
- consumer-no tech involved: casual users, hikers etc.
- hobbyist-some tech, more capabilities
- explorer-expanding capacity
Level 1: consumer
SenseCap tracker:
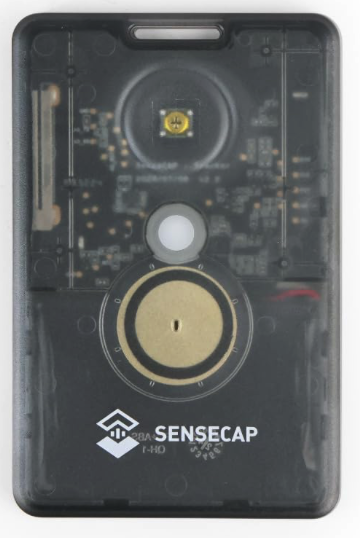
- credit card format
- limited range (internal antenna)
- buzzer for alerts
- special charging cable
- cheap, easy to configure
s5 trekker
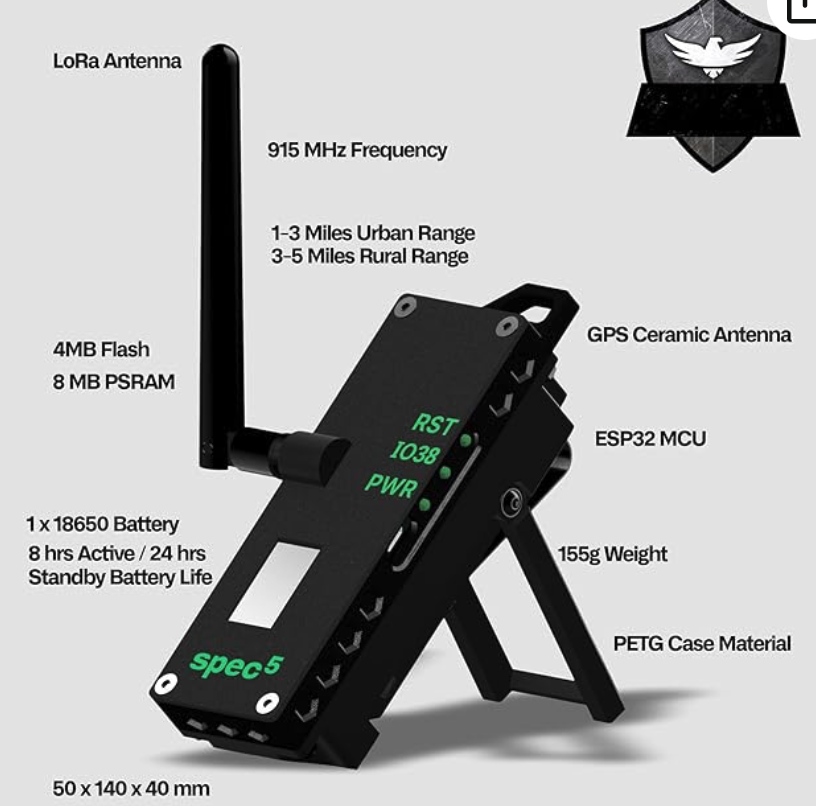
- Good for hikers, backpackers
- GPS included
- screen useful
- better antenna
- excellent battery life (>24 hours)
- rugged
- can be used with android ATAK system
- ESP32-S3 guts, can be set to wifi for range testing, etc.
- USB-micro charging
LIlygo T-echo
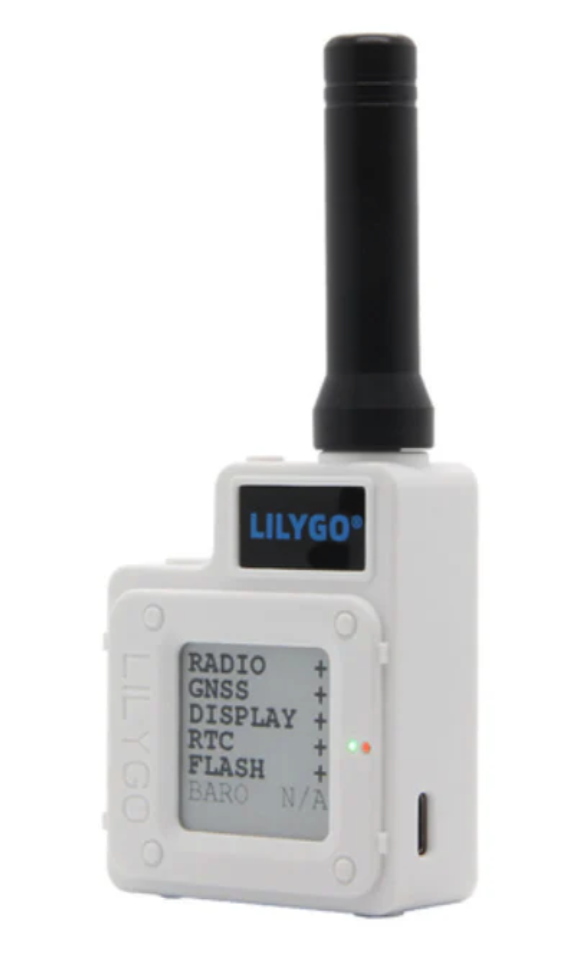
- USB-C charging
- very portable
- better antenna (dipole)
- small screen
- based on NRF52840 chip-excellent battery life
Lilygo T-deck
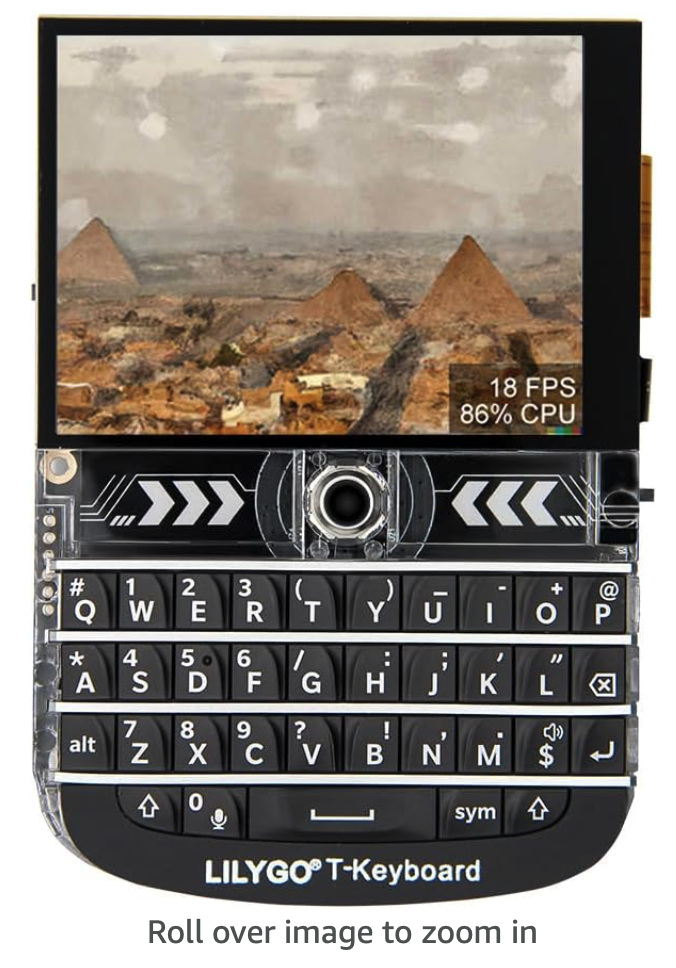
- ESP32-S3 chip, web page possible, wifi included
- touch screen
- keypad
- GPS included
- larger, less portable
- shorter battery life
- USB-C charging
Level two: Hobbyist
Some of these are kits, some you can make your own case for (3d printed), all have more capacity than consumer level devices, depending on firmware
Lilygo T-Beam
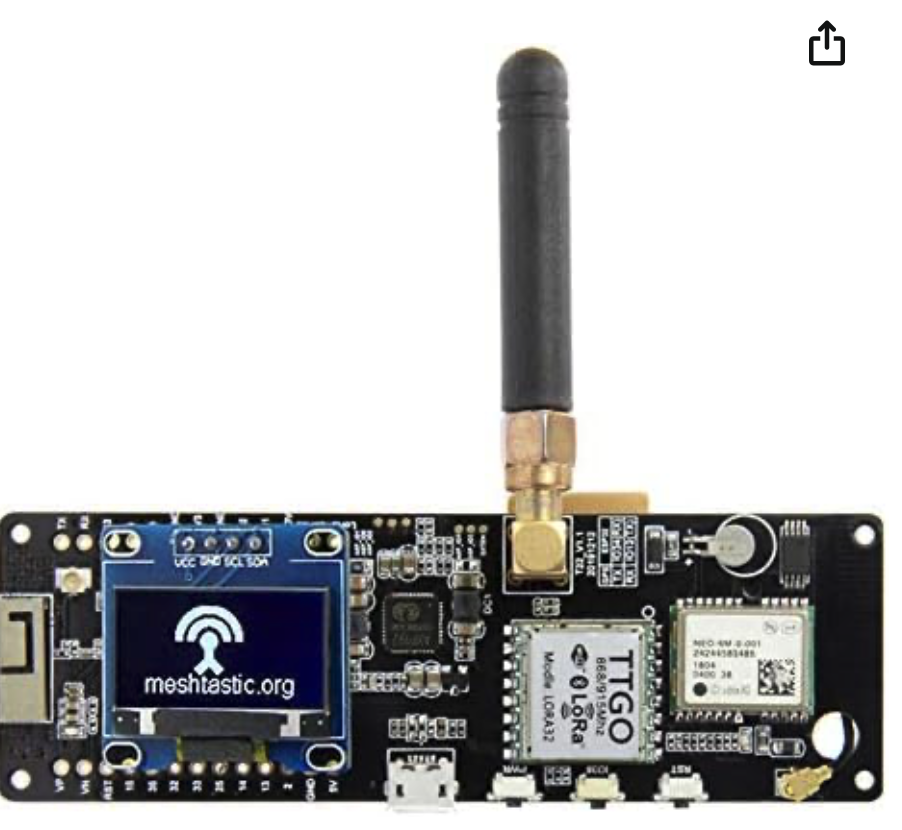
- my go-to board for testing
- good antenna
- add battery to the back, excellent battery life
- ESP32-S3 chip, includes wifi and web page access
- internal sensors for temp, rh, air quality
- GPS included
- same guts as in the Trekker above, without the case
RAK WisBlock board: RAK19007 base and RAK4631 LoRa module
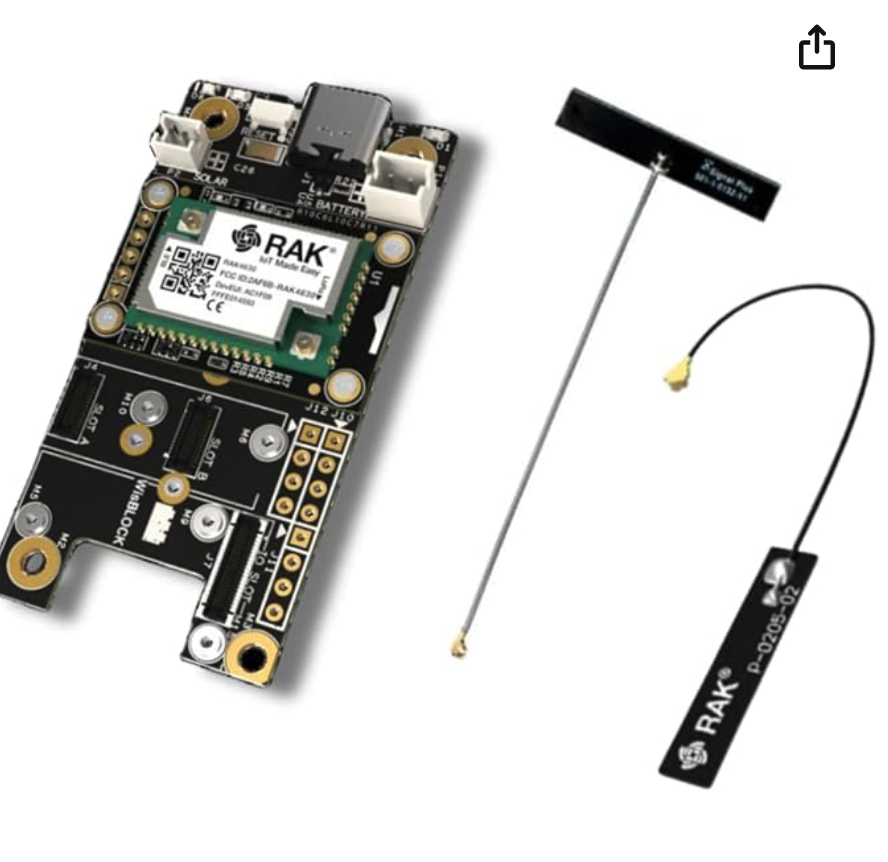
- very small, good on power
- fun to play with, can attach sensors to board or with modules from RAK
- core of later repeater and router modules
- CAUTION: power connection is reverse of all known plugs
- includes solar charging plug
- can be adapted to external antennas
ESP32 V3 board:
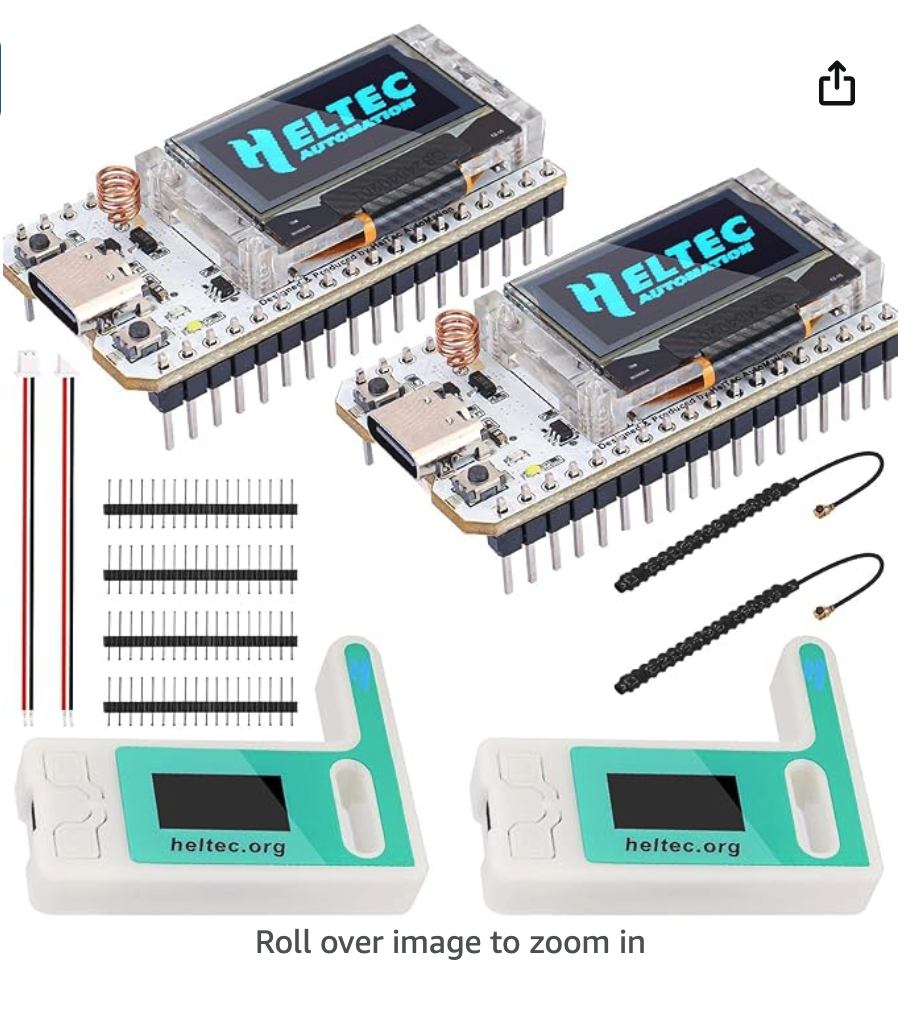
- my favorite board for portable use
- easy to put together, get the kit with the battery
- fun to give to friends
- includes screen
- when used without the case, can be a powerful repeater or router
- includes wifi antenna
- firmware supports web page, rangetest tracking
Level three: explorer
Station G2:
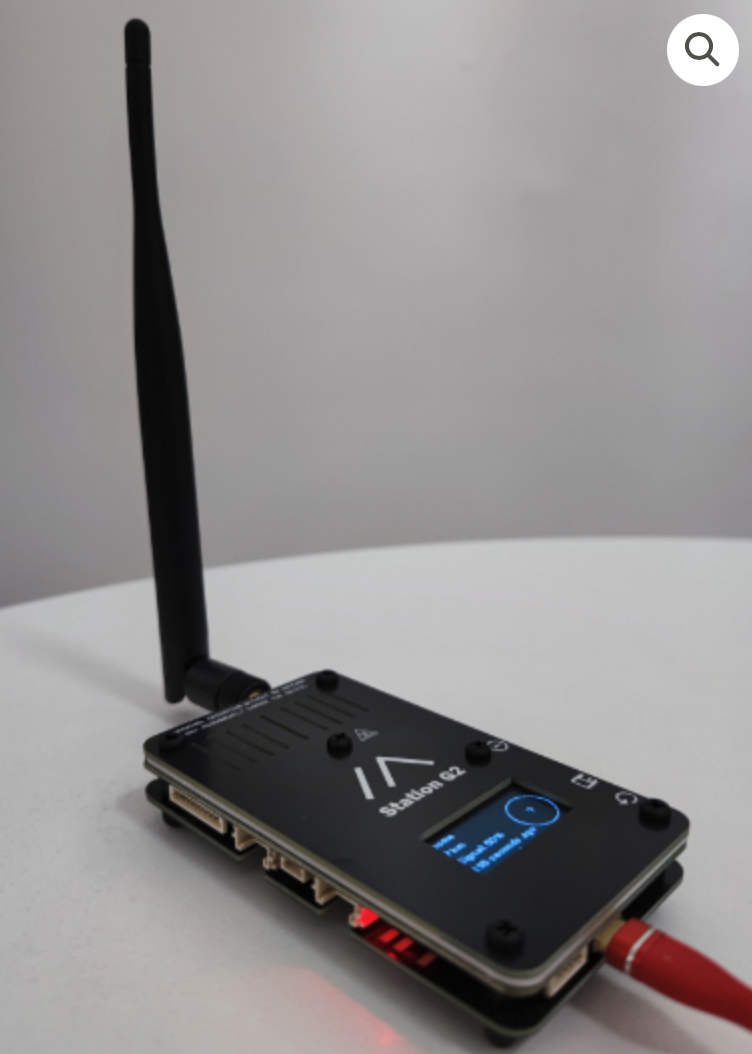
- USB-C or wired power
- If external power or PD level USB-C can run power amplifier
- power amplifier to 4 Watts (vs. 0.164 W of others)
- if used as power amplifier, must set module power to 19 dB to not overload PA
- best for remote repeaters, routers, hilltop units
- extremely long range (e.g. Waikii on Big Island to Oahu)
RAK solar repeater/router:
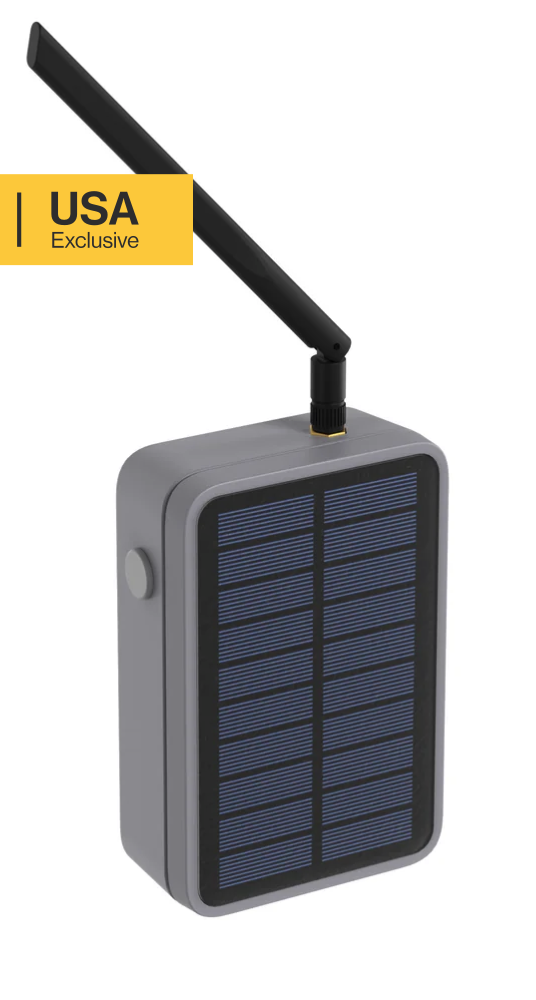
- setup and drop at remote locations (by drone?)
- essentially a RAK board with solar panel and 3000 mAh battery
- excellent dipole antenna (look for wire inside to tell)
- very long range (Waikii on Big Island to Oahu)
- configure via USB-C (rubber plug port on side)
- testing drone delivery of these...
- 400 grams total (drone folks)
Antennas:
There are essentially 4 types of external antennas possible, beyond the internal ones on some devices:
- whip (stick) antenna: look for screw on with no internal wiring, needs ground plane
- whip dipole antenna: much better, needs no ground plane, often flexes 90°
- 8 dB omni antenna: various vendors, stay away from high dB claims, should be quite large, not cheap
- 13 dB yagi antenna: looks like a fish skeleton, very directional, only used for long haul links
Migrated from Apple Server Wiki. Original page ID: f2K4o8a